How to Use Photoshop Inside ChatGPT
I recently found out that you can edit photos directly within ChatGPT using the Adobe Photoshop. No need to switch between different tools or apps. Everything happens in one place.
When I first heard about this, I was skeptical. But after trying it out, I realized how useful it could be for quick edits and creative work. Here’s everything you need to know to get started.
Get Photoshop Connected to ChatGPT
First, you need to connect your Adobe Photoshop to ChatGPT. It’s a quick process.
Go to chatgpt.com and click on your name in the bottom left corner. And then click on Settings option. Look for the “Apps and Connectors” tab and click on it.
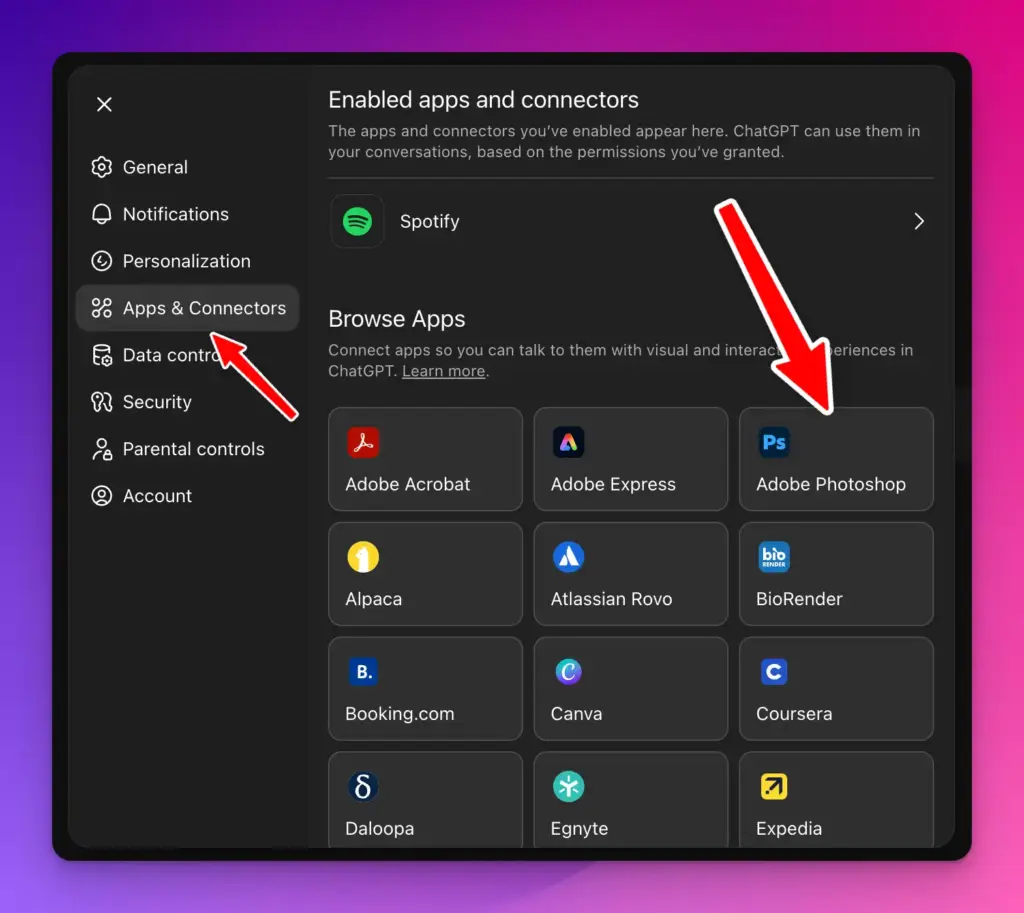
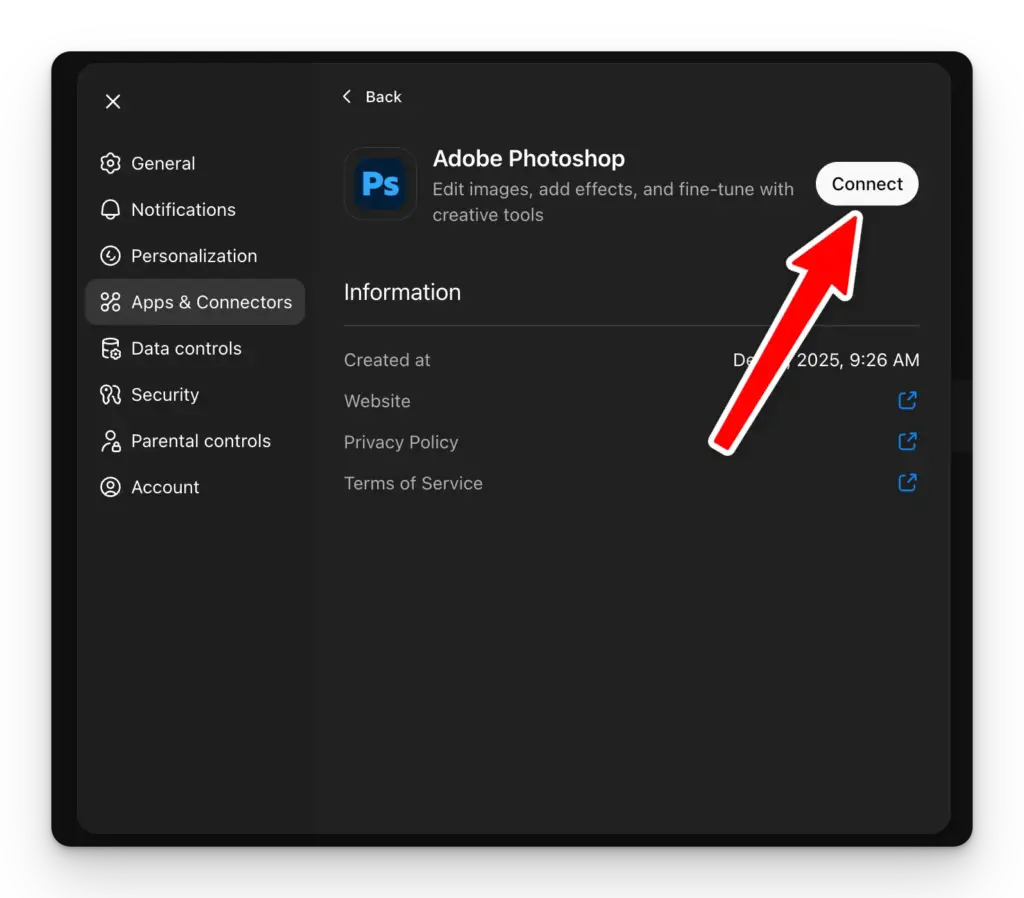
Find the “Adobe Photoshop” app in the list. Click on it, then click “Connect”. You’ll see a second “Connect” button to accept the terms and conditions. Click that one too.
Once you’re connected, close out of the settings. That’s it. You’re ready to start editing.
Start a New Photoshop Session
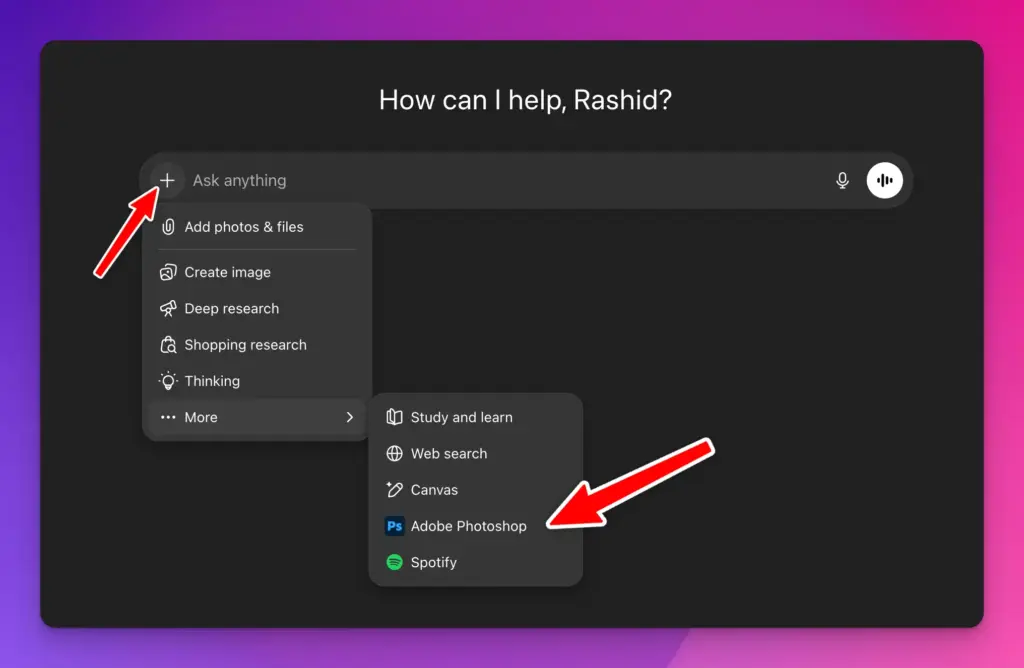
Creating a new Photoshop workspace is simple. Click the plus icon at the top of ChatGPT to start a new chat.
Then go into “More” and select “Adobe Photoshop”. You’ll notice the Photoshop icon now appears right below the prompt box. This is your signal that Photoshop is active and ready.

Add a Photo to Edit
Now it’s time to bring in the image you want to work on. Click the plus icon again and choose “Add photos & files”.
Select the photo from your computer. Once you pick it, the image shows up in the prompt box as your reference. You can now start editing it using simple text commands.
Edit Your Image With Text Commands
This is where the experience really differs from traditional Photoshop. Instead of hunting for buttons and menus, you just describe what you want in plain language.
Type your edit request directly into the prompt box where you would normally chat with ChatGPT. Be as specific or general as you want. The more detail you provide, the better the result tends to be.
One important thing to note: ChatGPT won’t do generative fill replacements or create entirely new content where there was nothing before.
It can adjust colors, add effects, change saturation, apply filters, and modify what’s already in your image. But it can’t conjure up objects that weren’t there originally.
Here are some real examples of edits you can request:
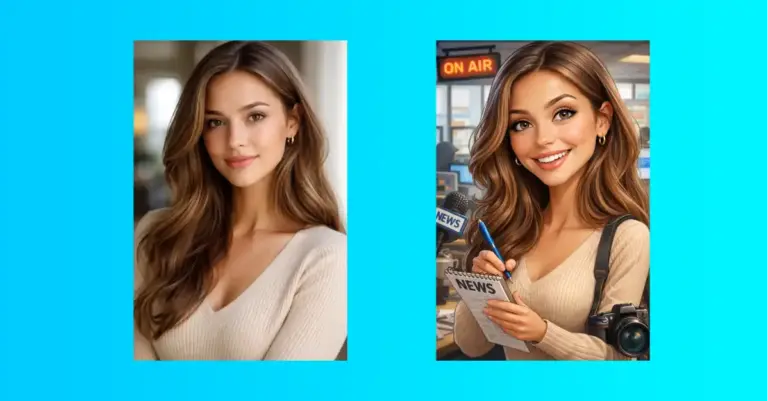
“Make the background black and white” – This keeps your subject in color while turning the background grayscale.
“Add a creative effect” – ChatGPT will apply an artistic effect that it thinks works well with your image.
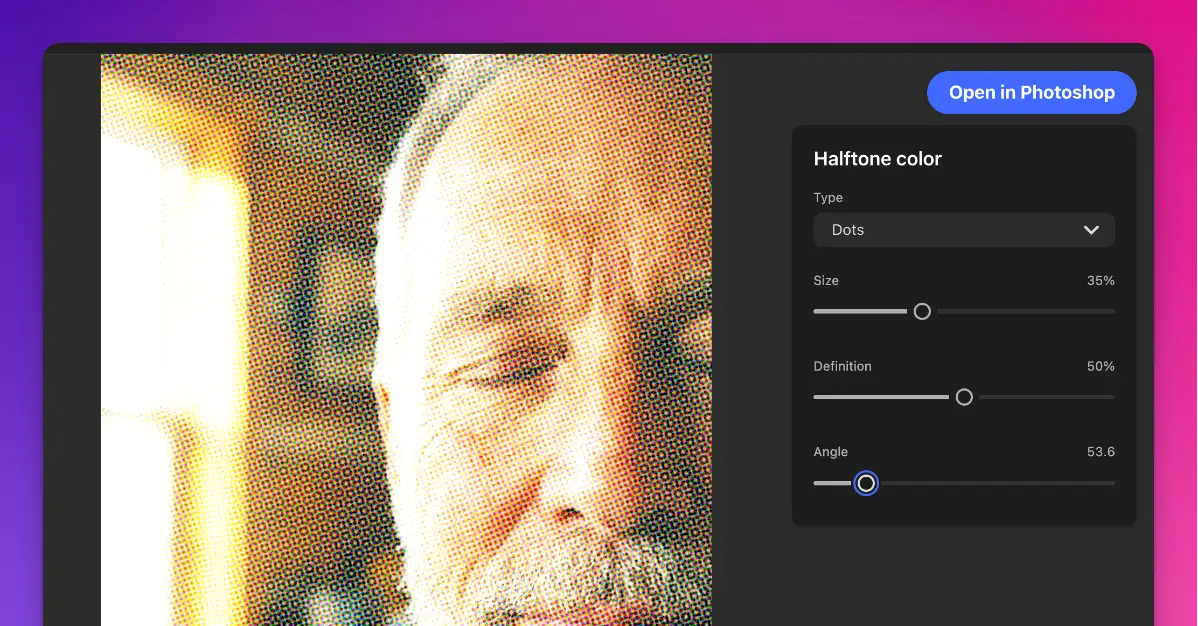
“Add a halftone effect” – This gives your photo that classic comic book or vintage print look.
“Apply a duotone effect” – This limits your image to two colors, creating a striking, artistic appearance.
“Remove the duotone effect” – If you change your mind, you can easily undo effects.
“Add more vibrance to the image” – This makes your colors more vivid and energetic without changing the overall tone.
“Remove background of the main subject” – This removes background and gives us a proper transparent background.
You’re not limited to these examples. You can ask for anything that adjusts or enhances what’s already in the image. ChatGPT is pretty good at understanding what you’re asking for, even if you’re not using technical Photoshop terminology.
After you type your command, hit Enter or click the black up button. ChatGPT processes your request and applies the changes to your image. The edited version appears right below, and you can see the results immediately.
Fine-Tune With the Properties Panel
After ChatGPT makes an edit, you can adjust it further. Look for the properties panel icon on the top right of your edited image.
Click it to expand the panel. You’ll see sliders and controls that let you fine-tune the adjustment. This is helpful if you want the effect stronger, weaker, or slightly different.
Go Deeper With Photoshop on the Web
Sometimes you might need to make adjustments that ChatGPT can’t do. That’s when you open your image in Photoshop on the web.
Click the “Open in Photoshop” button. ChatGPT will create a link for you. Click “Ready to open” to launch Photoshop on the web.
Here’s the good part: all your adjustments come over with you as individual adjustment layers with layer masks. You won’t lose any of your work.
Find All Available Adjustments and Effects
Want to know exactly what you can do? ChatGPT can give you a full list.
Type this message: “Give me a comprehensive list of all the adjustments you can apply with the Photoshop app.”
You’ll get all the adjustments available. If you want to see every effect instead, type: “Give me a full list of the effects.”
This saves you time guessing what’s possible. You’ll know exactly what commands to use.
Why This Matters
Using Photoshop inside ChatGPT means fewer open windows and less switching between apps. You get quick edits done right where you’re already working. For simple adjustments and effects, it’s fast and efficient.
This feature won’t replace Photoshop for serious design work, but it’s perfect for quick edits and creative experiments. If you need something more complex, you can always jump into Photoshop on the web with everything you’ve done preserved.
Give it a try next time you need a quick photo adjustment. You might be surprised how much you can do with just a few text commands.