Midjourney Prompts for Camera Angles
Midjourney, the cutting-edge AI image generator, has revolutionized how we interact with visual art. With simple text prompts, anyone can become a digital artist, conjuring up stunning landscapes, fantastical creatures, and evocative portraits.
But, to truly take your Midjourney creations to the next level, it’s essential to understand the often overlooked power of camera angles.
Think of Midjourney as your virtual cinematographer. Just like in traditional filmmaking, the strategic placement and movement of a camera dramatically influence the mood, message, and overall impact of a scene.
A simple change in camera angle can make a subject appear vulnerable or dominant, expansive or claustrophobic. Even the subtlest shifts can add layers of subtext and emotion to your generated images.
In this blog post, we’ll take a deep dive into the world of Midjourney camera prompts. We’ll demystify camera angles, exploring how they manipulate perspective and guide the viewer’s eye. With knowledge of camera shots and angles, you’ll be able to inspire your Midjourney creations with greater depth, visual storytelling, and the impact of cinematic masterpieces.
The Anatomy of Camera Angles
Camera angles are the backbone of visual storytelling. They determine how we, the viewers, relate to the subjects and scenes within an image. Midjourney, with its sophisticated understanding of visual language, can expertly mimic a wide range of camera angles through the right prompts.
Think of a camera angle as the eye through which we experience the scene. In this section, we’ll break down some of the most fundamental camera angles used in filmmaking and photography and how to translate them into effective Midjourney prompts. Let’s begin!
Eye-Level Angle
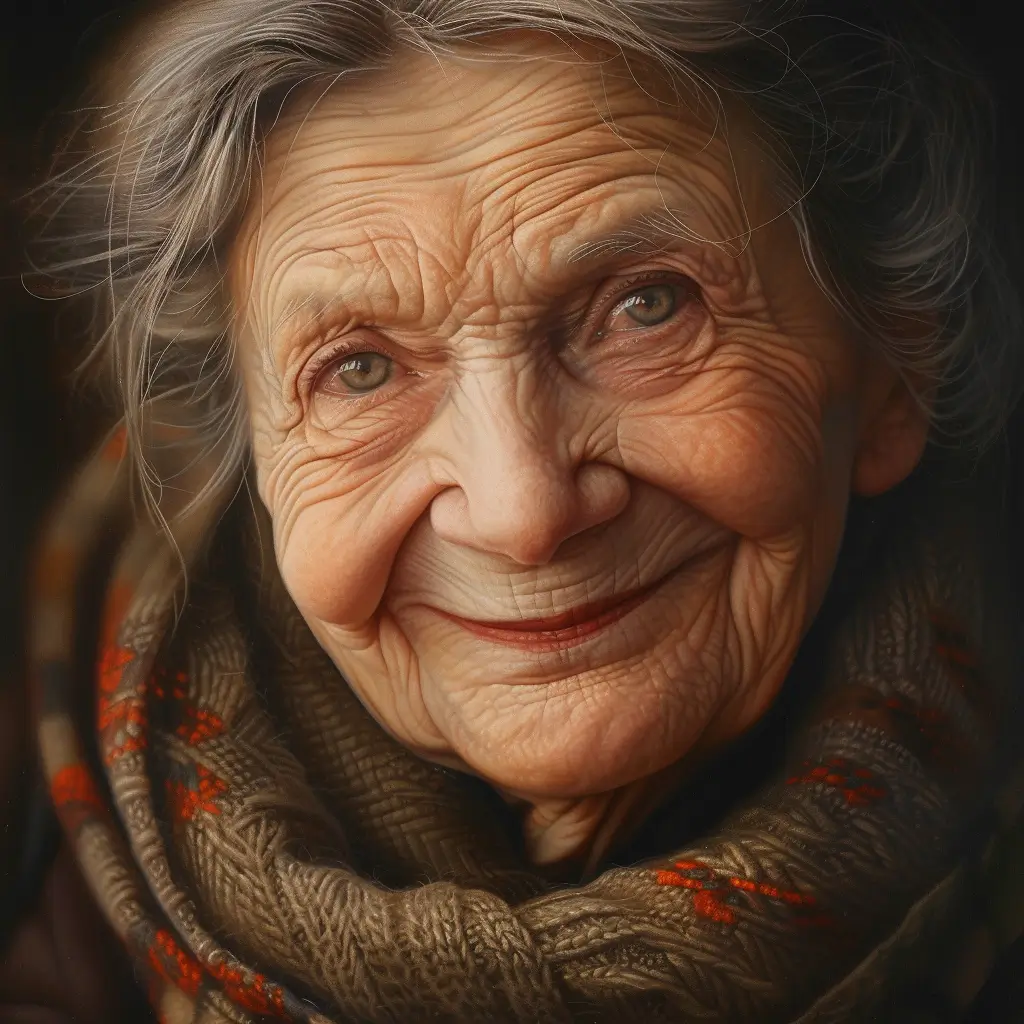
The eye-level angle is, in many ways, the most ‘neutral’ of the classic camera angles. It positions the viewer as if they are standing on the same ground as the subject, looking at them straight on. This lack of vertical distortion creates a sense of equality and connection between the viewer and the image subject.
- The Feel: Natural, familiar, creates a sense of relatability with the subject.
- When to Use: Portraits where you want to connect with the person, conversations between characters, establishing a neutral baseline for a scene.
- Example Prompt: “Portrait of a wise old woman, eye-level angle, detailed wrinkles, gentle smile, soft morning light”
High Angle
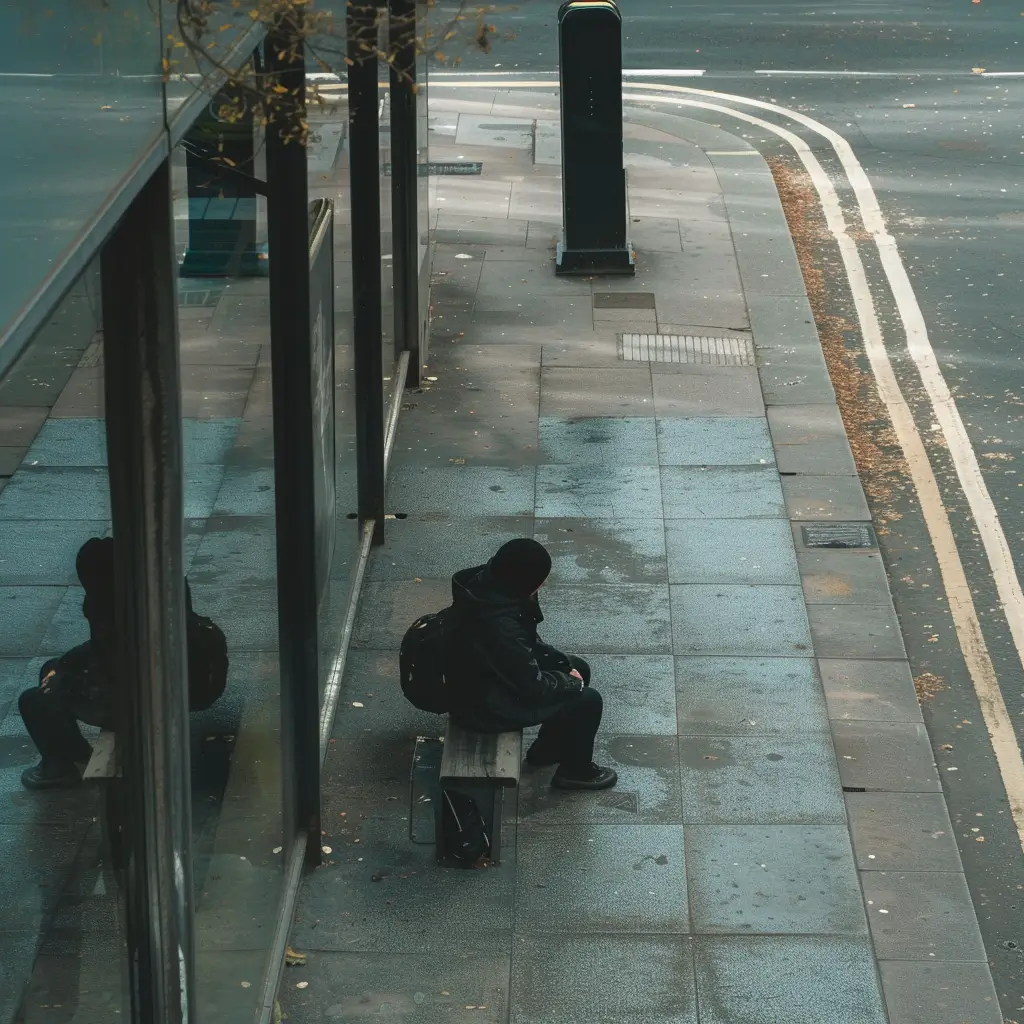
In a high-angle shot, the camera looks down on the subject, instantly establishing a power dynamic. The subject appears smaller, diminished, and potentially more vulnerable. High angles can create feelings of isolation, insignificance, or even fear depending on the context of the image.
- The Feel: Can make the subject feel weak, childlike, insignificant, or a sense of being overwhelmed.
- When to Use: Showing a character lost in a large environment, conveying vulnerability in a conflict, illustrating a character’s fear.
- Example Prompt: “High angle shot of an individual sitting alone at a bus stop, hunched shoulders, looking lost or waiting.”
Low Angle
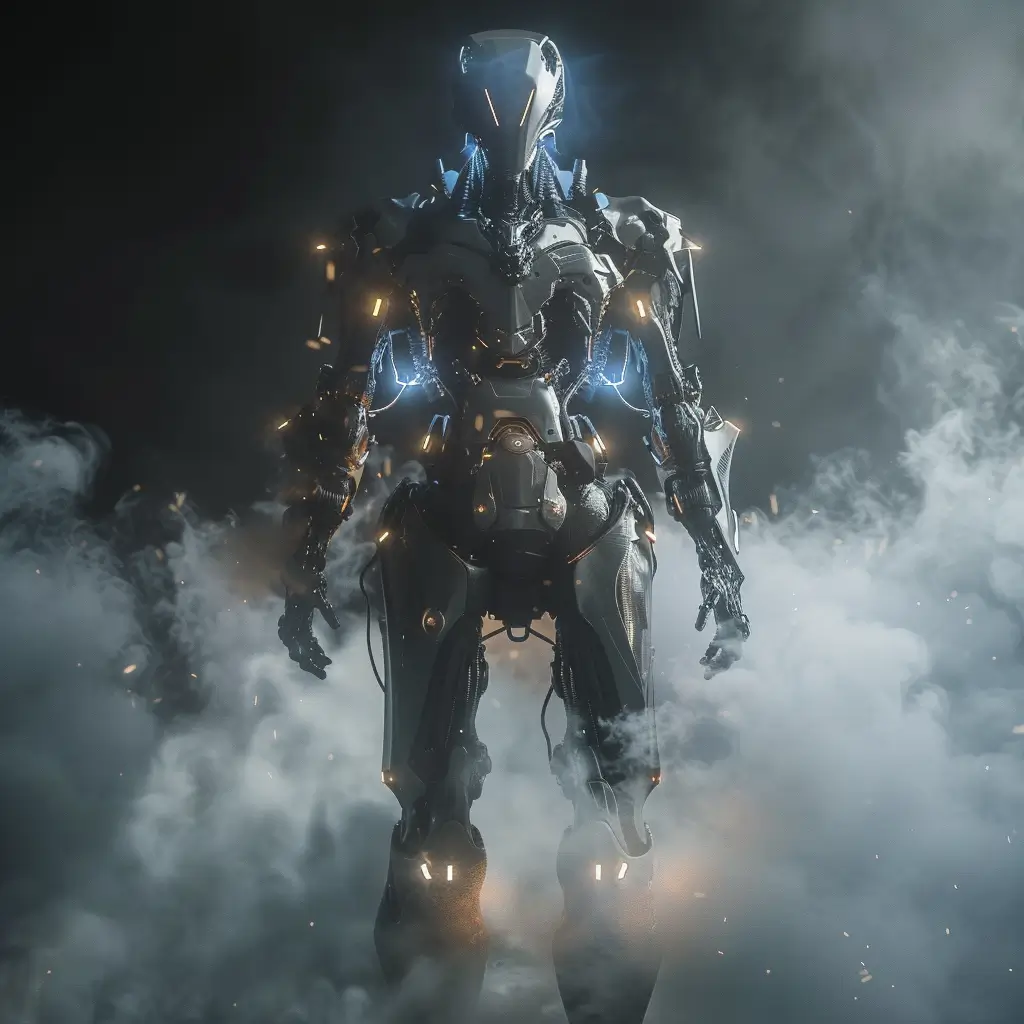
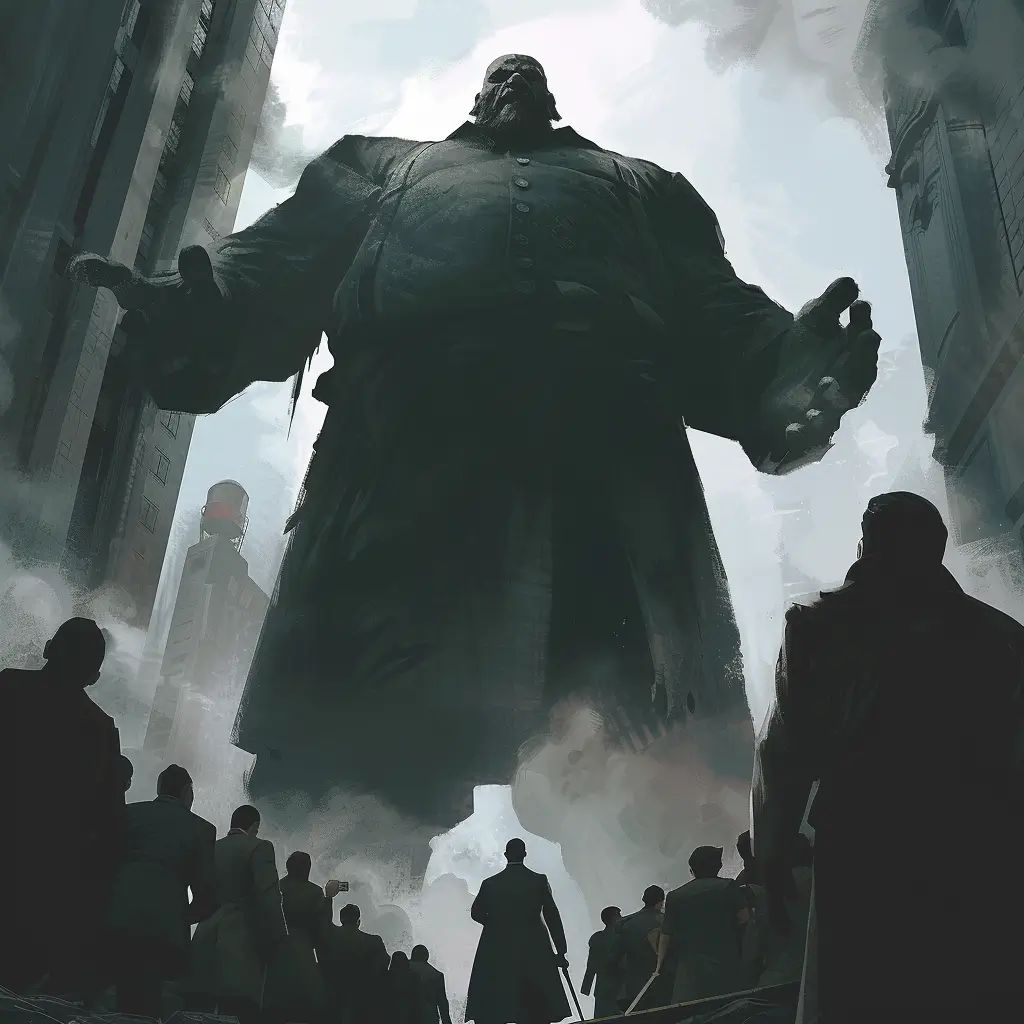
The low angle shot is the dramatic opposite of the high angle. Here, the camera looks upwards at the subject. This perspective makes the subject appear larger, powerful, and often imposing. It can evoke feelings of awe, heroism, intimidation, or even a touch of fear.
- The Feel: Makes subjects appear dominant, imposing, majestic, or potentially threatening.
- When to Use: Emphasizing the strength of a character, establishing their authority, creating a sense of awe for a structure or landscape, conveying heroism.
- Example Prompt: “Low angle shot of a futuristic robotic knight, shining armor, dramatic lighting, towering over the viewer, smoke swirling around their feet”
Different Camera Shots
We’ve explored how the angle of our virtual camera lens directly influences the perception of the subject. Now, let’s talk about how much of the scene that lens captures.
Camera shots describe the framing of an image and control how much we see of the subject and their surroundings. Midjourney’s grasp of this visual vocabulary allows you to control the scope and focus of your artwork with surprising precision.
In this section, we’ll break down the most common camera shots and see how they work within Midjourney prompts.
Wide Shot (or long shot)
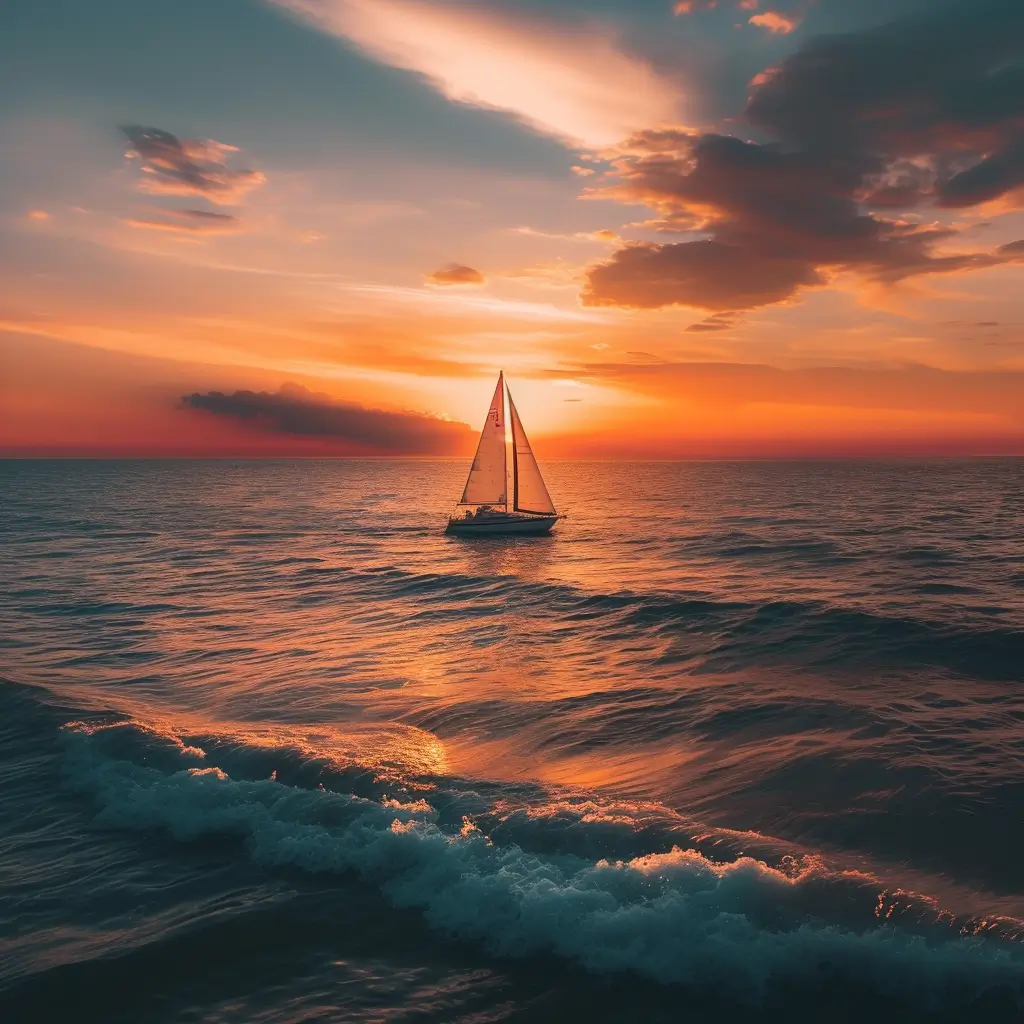
A wide shot is all about establishing the setting. The subject often appears fairly small within the frame, with lots of emphasis on the environment and any background details. Wide shots provide context and allow viewers to take in the overall atmosphere of a scene.
- The Feel: Gives a sense of scale, establishes geography, showcases environment, can create a feeling of isolation if subject appears small
- When to Use: Introducing a new location, showing landscape vistas, conveying the enormity of a setting compared to an individual, establishing shots
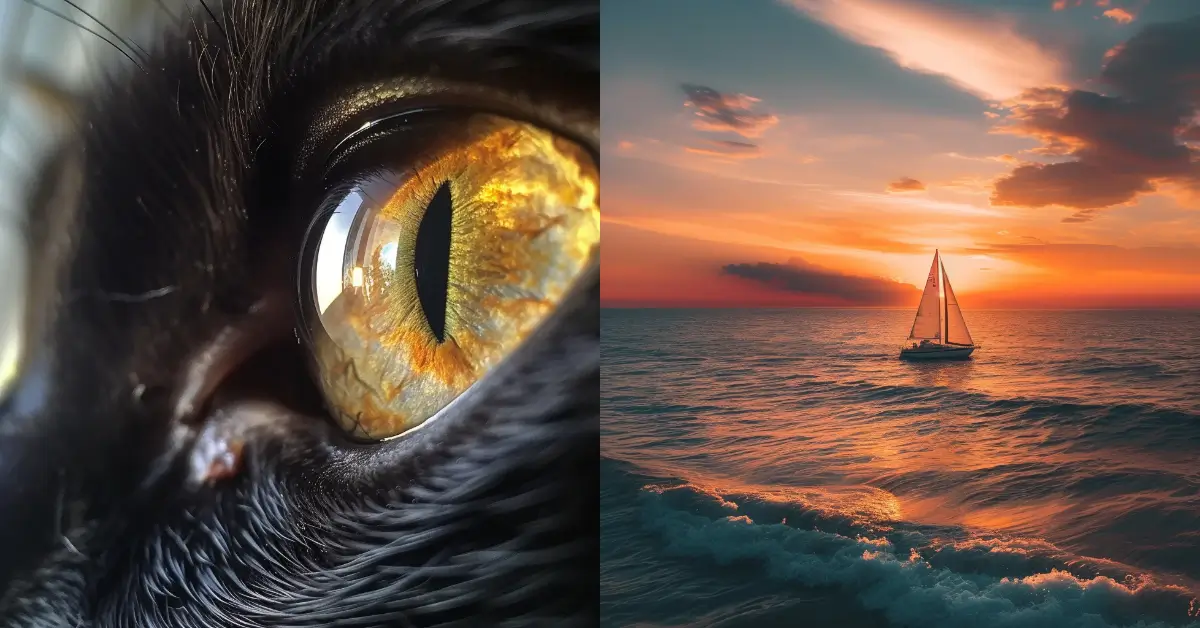
- Example Prompt: “Wide shot of a lone sailboat on a vast ocean at sunset, vibrant colors, waves gently crashing, sense of peace and solitude.”
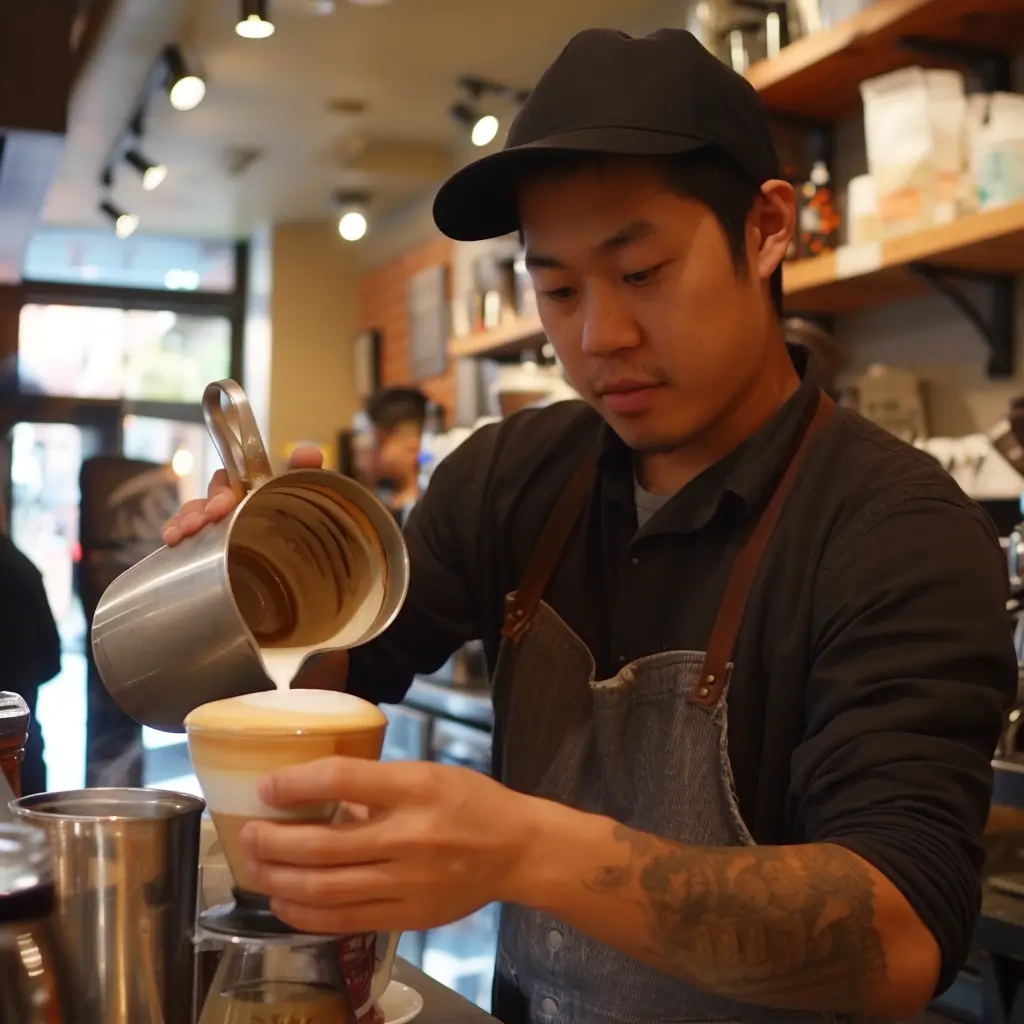
Medium Shot
The medium shot is the workhorse of visual storytelling. It offers a balance between focusing on the subject and including some background information. The subject takes up a significant portion of the frame, but their environment remains relevant. This balance makes the medium shot incredibly versatile.
- The Feel: Comfortable and familiar, emphasizes subject while retaining context, good for showcasing body language
- When to Use: Dialogue scenes, interactions between characters, displaying action while giving some sense of location, portraits that include gestures
- Example Prompt: “Medium shot of a barista meticulously crafting a latte, steamed milk pitcher in one hand, focused expression, bustling coffee shop in the background”
Close-Up Shot
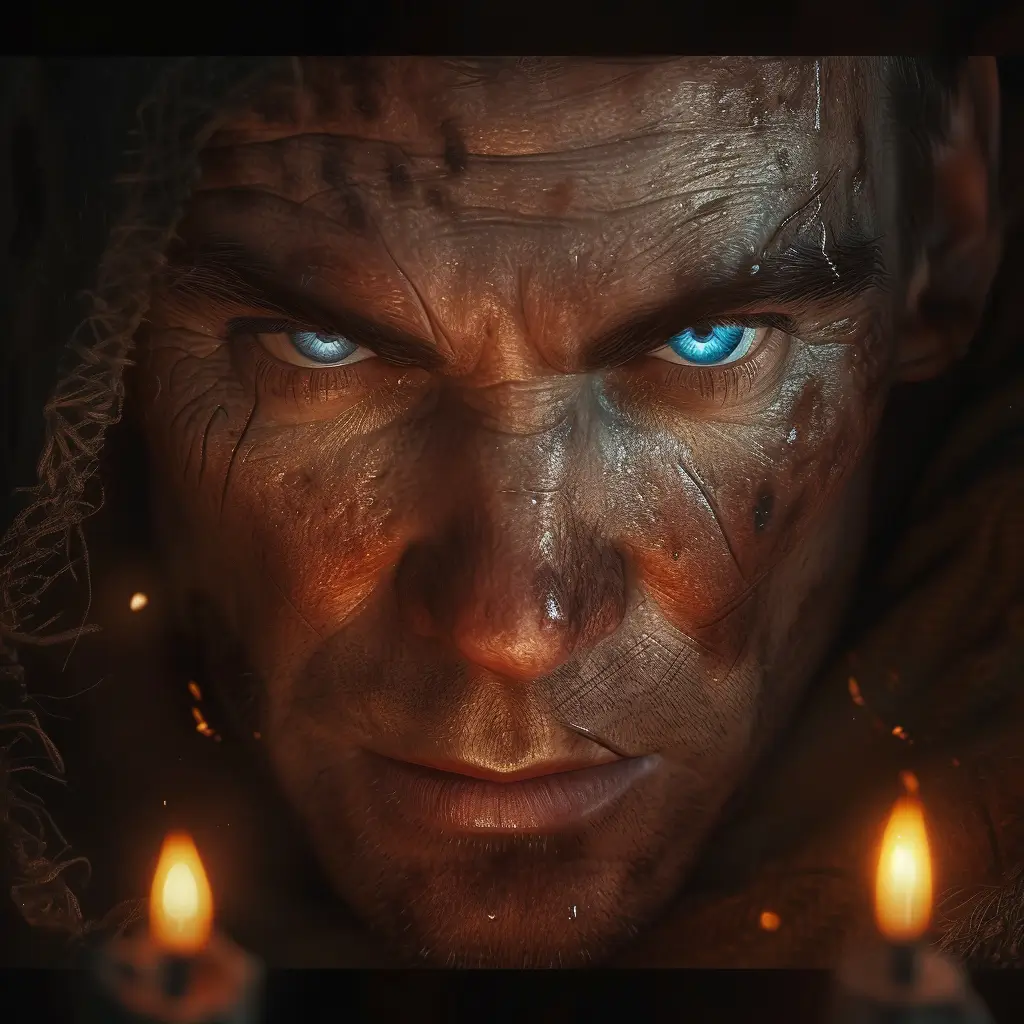
Close-up shots bring us into intimate proximity with the subject, stripping away all but the most essential details. The frame is filled with the subject’s face, an object, or a specific feature. Close-ups emphasize emotions, subtle expressions, and textures that other shots would miss.
- The Feel: Intimate, intense, conveys strong emotions, creates focus on minute details.
- When to Use: Capturing powerful facial expressions, showcasing the intricate details of an object, heightening a moment’s drama.
- Example Prompt: “Close-up of a weathered adventurer’s face, detailed scars, piercing blue eyes, a determined expression reflecting in a flickering torchlight”
Extreme Close-Up
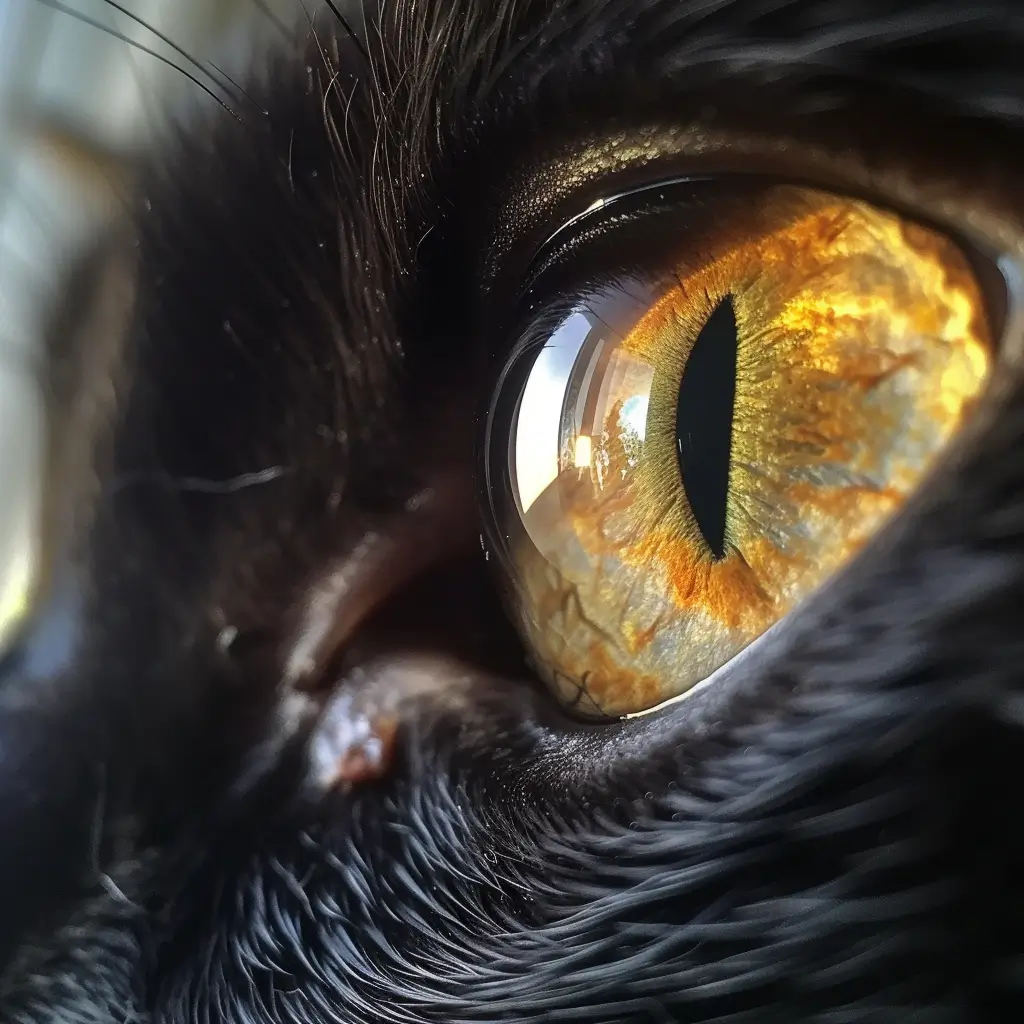
The extreme close-up takes the intensity of a close-up and amplifies it further. With this shot, a tiny detail dominates the entire frame. It can isolate a single facial feature, part of an object, or even an abstract, textured surface. Extreme close-ups create a sense of intimacy, suspense, or visual abstraction.
- The Feel: Intimate to the point of being startling, creates a sense of suspense, can be disorienting, highlights texture and patterns
- When to Use: Focusing on a single powerful emotion reflected in an eye, showing intricate details of a mechanism, creating an abstract image
- Example Prompt: “Extreme close-up of a cat’s eye, reflecting firelight, pupil dilated, gleam of mischief”
Advanced Concepts and Tips
Now that you’re armed with an understanding of basic camera angles and shots, it’s time to level up your Midjourney prompting skills! In this section, we’ll look into some more advanced techniques to make your images even more dynamic and visually engaging.
Let’s explore how to combine camera techniques, mimic specific camera lens effects, and leverage cinematic language to take full control of your Midjourney compositions.
Combined Angles and Shots
The real power of camera angles and shots comes alive when you combine them strategically. Think of camera choices like building blocks; when you stack them in a deliberate way, you can tell a complete visual story with your Midjourney images. Here’s how to harness that power:
- Progression: A simple series of prompts illustrating a shifting camera perspective can heighten drama and tell a wordless short story.
- Example:
- Prompt 1: “Wide shot of a vast battlefield, armies poised for battle, ominous clouds overhead”
- Prompt 2: “Medium shot of two soldiers facing each other, swords drawn, tension in their postures”
- Prompt 3: “Close-up of a single soldier’s eyes, a mixture of fear and determination”
- Example:
- Shifting Power Dynamics: Playing with different camera angles can visually express a change in status between subjects.
- Example:
- Prompt 1: “Low angle shot of a villain addressing a crowd, looming large, citizens appearing small and subdued”
- Prompt 2: “High angle shot of a hero rallying the crowd, the villain now seen from above, appearing weaker”
- Example:
Camera Lens Effects
Beyond basic angles and shots, Midjourney can also simulate the way that different camera lenses capture your scene. Understanding how to add these effects through your prompts can open up even more creative possibilities.
- Wide-Angle: Creates a sense of expansiveness, can slightly distort or exaggerate perspective. Try adding terms like “wide-angle lens” or “fisheye” to your prompts.
- Telephoto: Compresses distances, making far-off objects appear closer. Look for prompts using “telephoto lens” or “long lens”
- Macro: Extremely close focus on tiny details, emphasizing texture and magnifying small objects. Incorporate prompts with “macro lens” or “extreme close-up”
- Depth of Field Effects: Terms like “shallow depth of field” can mimic the “bokeh” effect, leaving your subject sharp but the background blurred. Conversely, “deep focus” will maintain everything in sharp detail.
Add Cinematic Language
You can push your Midjourney prompts even further by borrowing words and concepts directly from the world of filmmaking. Filmmakers have a specialized vocabulary to describe camera movements and their effects on storytelling. This language translates surprisingly well into Midjourney image generation. Here are a few examples:
- Dolly Zoom: The camera moves closer or further from the subject while simultaneously zooming in the opposite direction, creating a disorienting yet striking effect. Try adding “dolly zoom” to your prompts.
- Crane Shot: Mimics the movement of a large crane lifting or lowering the camera. Use “crane shot” for dramatic views from above or to introduce a sense of scale.
- Panning Shot: The camera rotates horizontally without changing position, allowing the viewer to scan a scene. Prompt with “panning shot” or “pan across”.
- Tilt Shot: The camera rotates vertically, often to reveal something significant at the top or bottom of the frame. Include “tilt shot”, “tilt up”, or “tilt down” for this effect.
Combining cinematic terms with the angles and shots we’ve previously explored gives you incredible control over the way the viewer experiences an image.
Throughout this blog post, we’ve explored the subtle art of camera angles and how Midjourney transforms prompts into evocative visual experiences. Remember, even seemingly small shifts in perspective, framing, or the suggestion of a specific lens can vastly change the emotion and storytelling power of your images.
The key to truly harnessing Midjourney’s ability is to think like a cinematographer. View your prompts not just as descriptive words but as instructions for your virtual camera operator. This shift in mindset helps you create compositions that captivate and tell compelling stories beyond mere aesthetics.
I encourage you to experiment! Test different combinations of angles and shots. Incorporate cinematic language and observe how it affects your results. Mastering Midjourney camera prompts adds a professional polish and intentional depth to your artwork. It’s one of the essential tools to turn you from a generator of images to a true digital artist.
One Comment