How to Replace Image Background Gracefully Using AI
There’s something odd about most AI background replacement tools. Sure, they can swap backgrounds, but the results often look artificial – like badly edited photos from the early 2000s. That’s why I was particularly interested when Freepik released their new background replacement feature.
Remove and replace the background of your images
— Freepik (@freepik) January 15, 2025
From an AI generated background, using Relight technology, to a simple color switch. The applications are limitless
Now available on Freepik pic.twitter.com/ZGx30LQ9iO
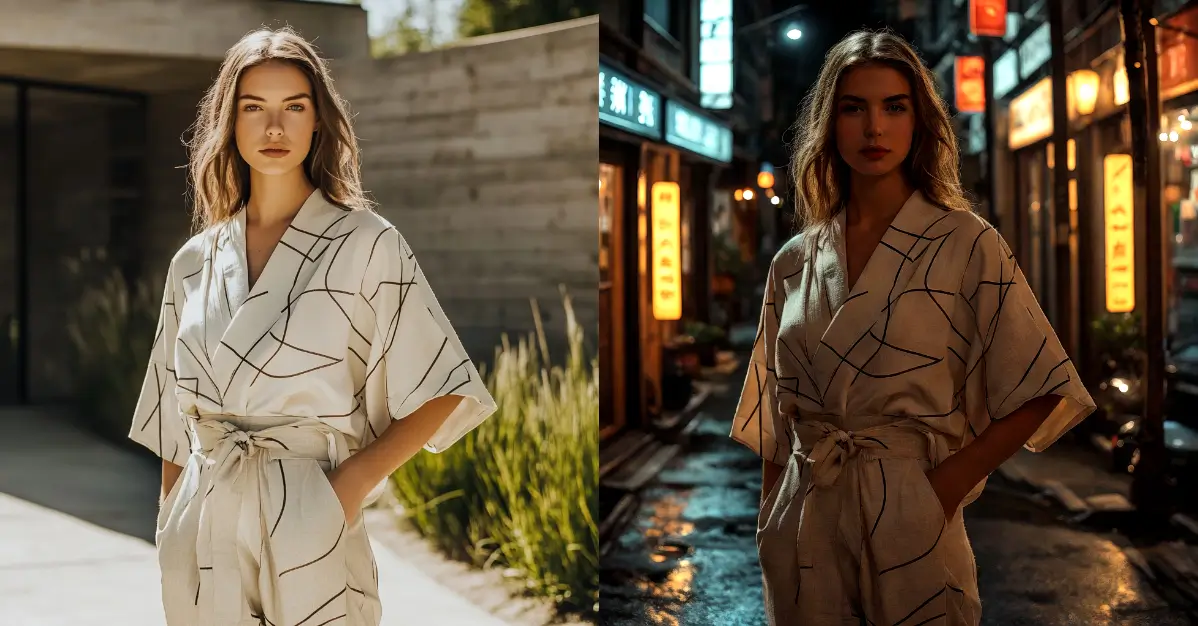
What caught my attention wasn’t just that it could replace backgrounds – lots of tools do that. It was how the lighting on the subject changes to match the new background. If you put someone in a night scene, they actually look like they’re being photographed at night. It’s these small details that make the final image look natural rather than obviously edited.
I’ve been testing this feature lately, and while it’s not perfect (no AI tool is), it handles the lighting and environmental integration better than most tools I’ve tried. Let me show you exactly how it works, what it does well, and where it sometimes falls short.
Freepik has grown beyond its roots as a stock image platform. Their AI suite now includes several creative tools, with background replacement being one of their latest additions. The tool sits alongside their AI image generator and text-to-video generator, making it part of a broader creative ecosystem.
A heads up – you’ll need a subscription to access these AI features. The background replacement tool isn’t available with their free plan. But if you’re already using Freepik for design resources, the AI suite comes as part of their premium packages.
What sets their background replacement apart is how it integrates with their other AI tools. You can generate new backgrounds using text prompts, similar to their image generator. This means you’re not limited to existing images – you can describe exactly what you want in the background.
They support various AI models for different tasks, though they don’t specify which ones power the background replacement feature. In my testing, this doesn’t really matter – what counts is how well it works, and we’ll get to that in the step-by-step guide.
Step-by-Step Guide to Replace Background
Let me walk you through how to use Freepik’s background replacement tool. I’ll break it down into simple steps:
- Start by going to freepik.com and clicking on “AI Image Generator” section.

- Once you’re in the AI section, look for “Edit” in the top menu and click it.

- In the left sidebar, you’ll see several options. Click on “Background” to access the replacement tools.
- Now upload your image.
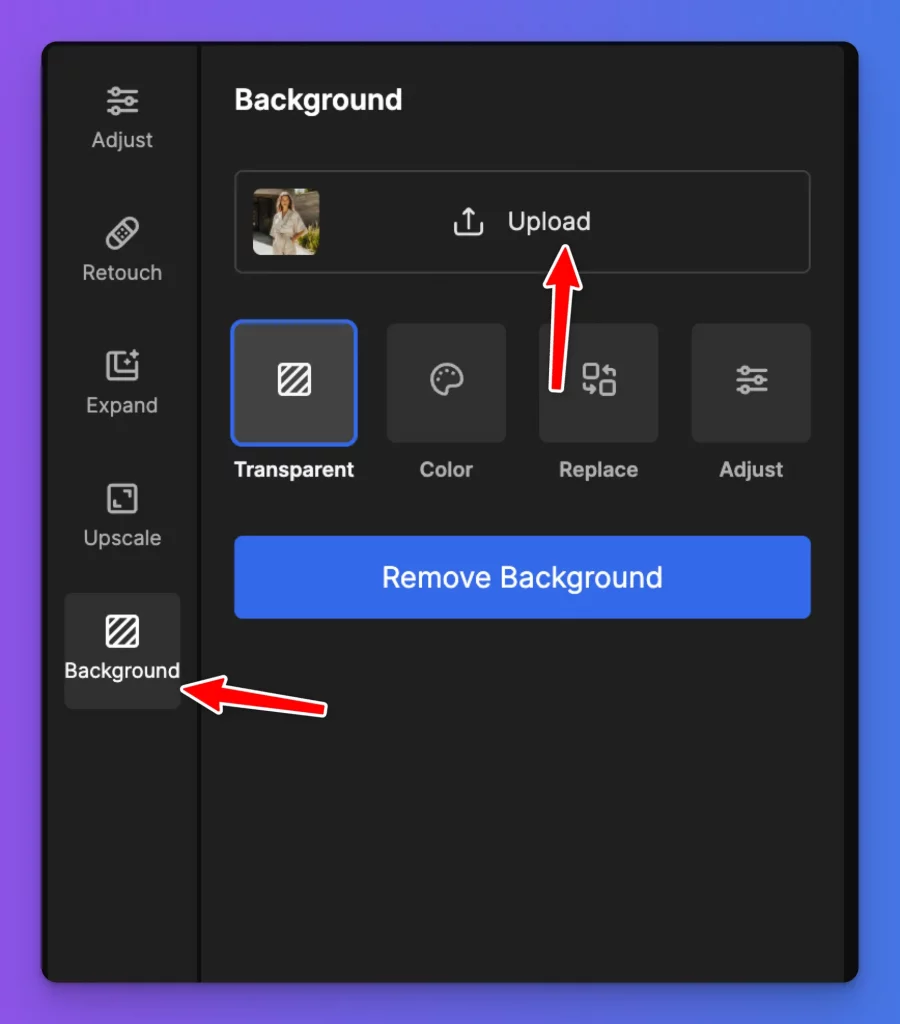
I tried this with a photo of a woman that I found in Midjourney explore section. You can use any clear photo where the subject is easily distinguishable from the background.
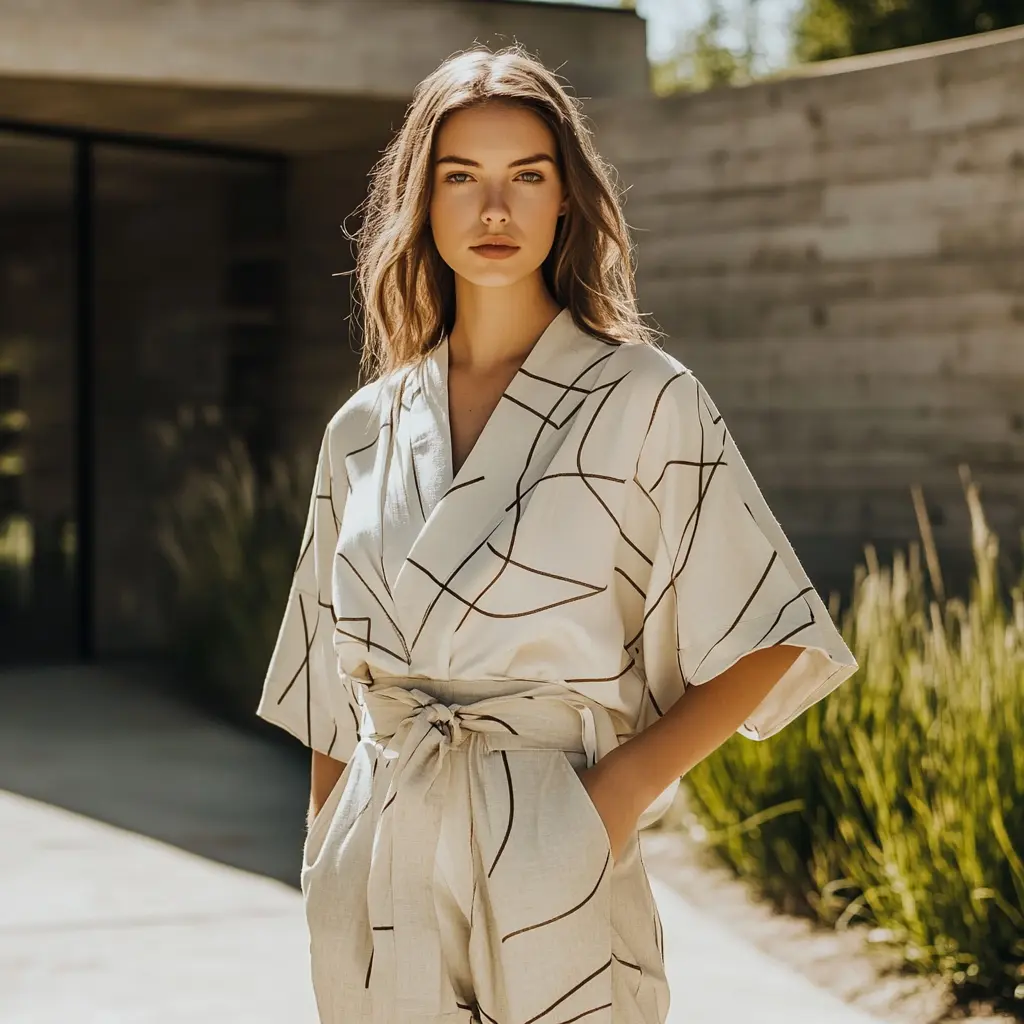
- After your image loads, select the “Replace” option. This is where the magic happens.
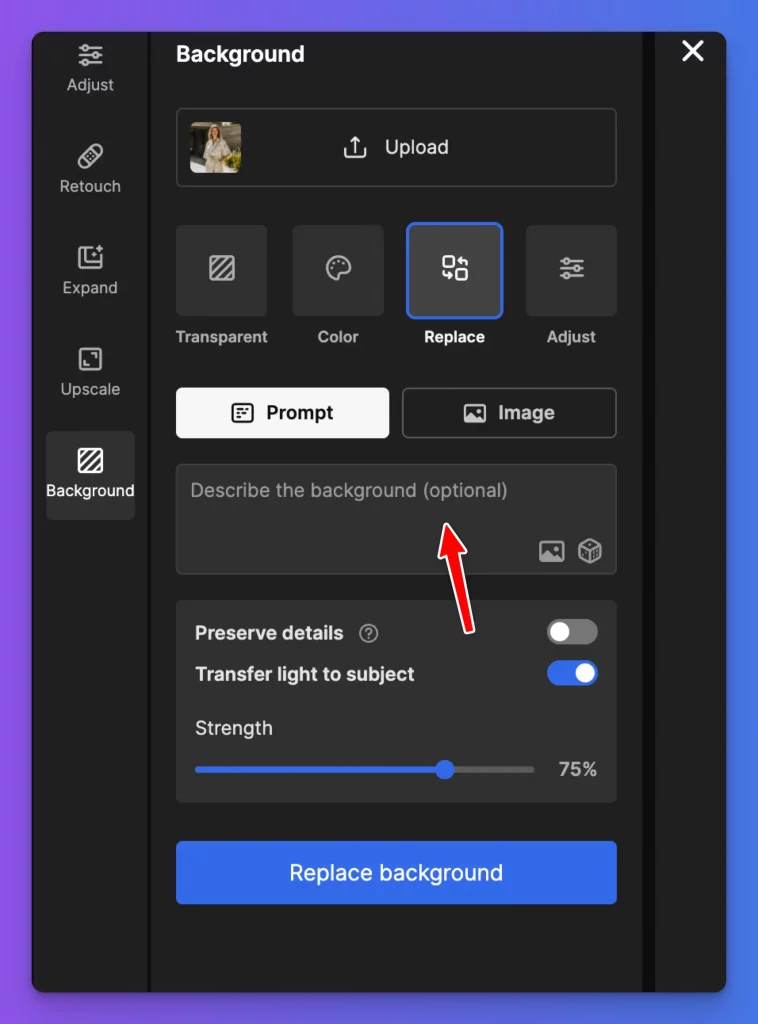
- Here’s the fun part – type in what you want for your new background. I typed “A street at night” to test how well it handles dramatic lighting changes.
- Important step: Make sure “Transfer light to subject” is turned on. This is what makes everything look natural by adjusting how light falls on your subject to match the new background.
- Hit the “Replace Background” button and wait a few seconds.
- You’ll see your result, with both the background changed and the lighting adjusted to match the night scene.
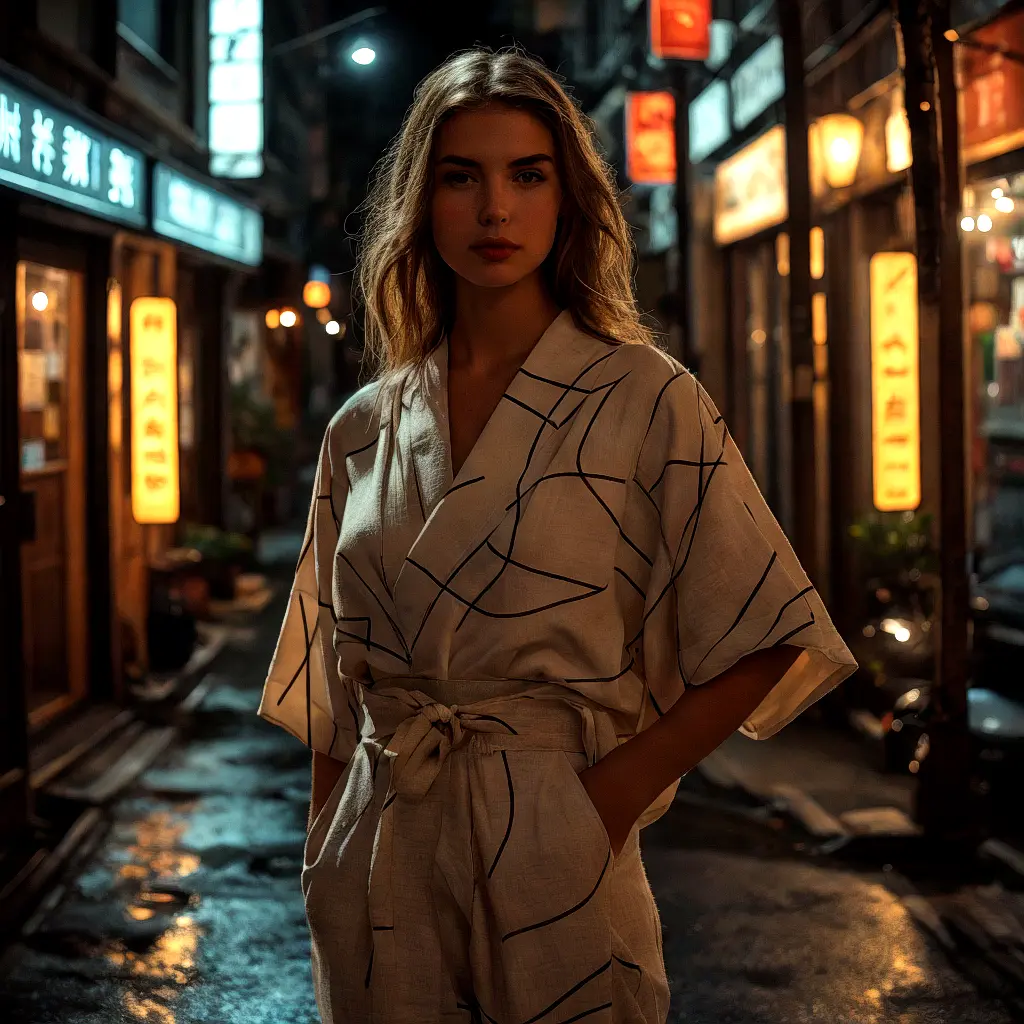
You can really notice how the background replaced organically by changing the light on the subject.
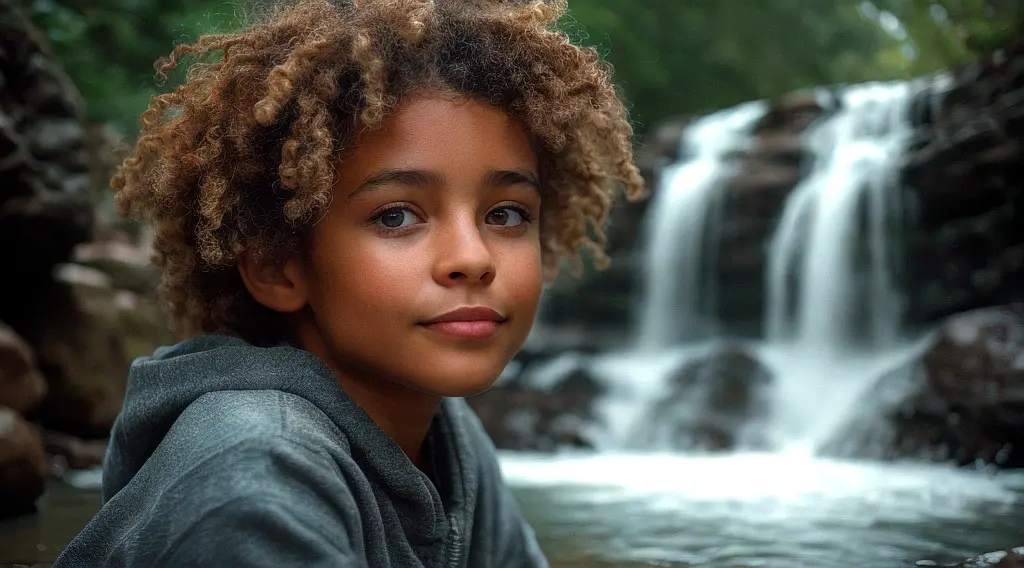
I also tried this features with two more images. Results are shown below.



Key Features
The real power of Freepik’s background replacement tool lies in a few key features that give you more control over the final result.
Transfer Light to Subject
This is the standout feature. When turned on, it analyzes the lighting in your new background and adjusts how light falls on your subject.
For example, if you place someone in a sunset scene, they’ll have that warm golden glow on their skin. If you move them to a night scene, the tool adds appropriate shadows and reduces harsh lighting.
Strength Adjustment
The strength slider is like a fine-tuning knob. At lower settings (around 20-30%), you get subtle changes that keep your subject looking very close to the original.
Crank it up to 70-80%, and the AI will make more dramatic adjustments to match the new environment. I find that starting at 50% and adjusting from there usually works best.
Preserve Details
Sometimes the AI can get a bit too enthusiastic and change parts of your subject you want to keep. That’s where “Preserve details” comes in.
Toggle this on when you want to keep specific features intact – like facial features, clothing textures, or hair details. It’s particularly useful for portraits where maintaining the person’s likeness is crucial.
Text Prompts for Backgrounds
You’re not limited to existing backgrounds. The tool understands detailed text descriptions. Instead of just saying “beach,” you can type “rocky beach at sunset with crashing waves” and get exactly that kind of scene. The more specific your prompt, the better your results will be.
Limitations
After spending time with this tool, I’ve noticed some situations where it needs extra attention or might not be the best choice.
Sometimes the AI changes your subject more than you’d expect. I’ve had cases where it altered clothing colors or facial features, even when I just wanted a simple background swap. The “Preserve details” option helps, but it’s not always perfect.
The lighting transfer can occasionally go overboard. While it’s usually great at matching the mood, there are times when it makes the subject too dark in night scenes or too washed out in bright settings. You’ll need to play with the strength slider to find the right balance.
I’ve also found that certain types of images work better than others:
Works best with:
- Clear, well-lit original photos
- Subjects with defined edges
- Simple poses
- Solid or simple original backgrounds
Can struggle with:
- Very busy original backgrounds
- Multiple subjects in one photo
- Complex hairstyles or flowing fabrics
- Highly detailed clothing patterns
- Photos with strong original lighting effects
If you’re working with professional photos or client work, I’d suggest running a few test images first. The results can be unpredictable, and you might need several attempts to get the exact look you want.
After working with Freepik’s background replacement tool, I can say it’s a solid addition to any creative toolkit. Yes, it has its quirks, and no, it won’t replace professional photo editing skills. But for quick background changes that actually look natural, it’s one of the better options out there.
The lighting adjustment feature really sets it apart from basic background removal tools. When it works well, it creates images that look like they were actually shot in the new setting. That’s a big step forward from the obvious cut-and-paste look we’re used to seeing.
Should you try it? If you already have a Freepik subscription and need to swap backgrounds regularly, absolutely. The tool saves time and often produces results that would take considerable effort to achieve manually.
