How to Create Personalized Midjourney Images
Midjourney is a popular AI image generation tool that creates impressive visuals from text prompts. While it often produces stunning results, getting exactly what you want can sometimes be a challenge.
That’s where personalization comes in. This feature helps you create images that match your unique style and preferences, saving you time and frustration.
When you give Midjourney a simple prompt, it generates four images with a wide variety of styles. Sometimes you might love them, and other times they might not quite hit the mark. It all comes down to personal taste.
Personalization is a game-changer. It’s designed to help you create images that align with your specific preferences. The best part? It often delivers the results you’re after on the first try, cutting down on the need for multiple attempts to get it just right.
In this post, I’ll walk through how personalization works in Midjourney, how to set it up, and how to use it effectively.
How Personalization Works
Personalization in Midjourney is pretty straightforward. It’s based on your likes and preferences, which the system learns over time. Here’s how it works:
- You rate images: As you use Midjourney, you’ll have the chance to like or rank images. This is the key to personalization.
- Midjourney learns your style: The AI uses the data from your ratings to create a unique style profile for you. It picks up on the elements you tend to prefer in images.
- Your style influences new generations: When you turn on personalization, Midjourney uses your style profile to guide the image creation process. This means the results are more likely to match your tastes.
- It keeps improving: The more images you rate, the better Midjourney gets at understanding your preferences. It’s an ongoing process.
The cool thing about personalization is that it works behind the scenes. You don’t need to manually input your preferences or describe your ideal style. Midjourney figures it out based on your interactions with the platform.
How to Enable Personalization
To start using personalization in Midjourney, you’ll need to do a bit of setup first. Here’s how:
Rate at least 200 Images
This is the minimum to unlock basic personalization. Go to the Midjourney web app and click on the Personalize menu in the left sidebar.

Click Start Teaching and you’ll see pairs of images. Select the one you prefer in each pair, or skip if you don’t have a preference.
Aim for Level 3
While you can start at 200 images (Level 1), I suggest rating at least 1000 images to reach Level 3. This gives the AI more data to work with, resulting in more accurate personalization. Plus, you earn fast hours as rewards for each level you reach.
Once you’ve rated enough images, you’re ready to use personalization in your prompts. You have two main options:
Toggle the Personalization Option
When generating images, look for a toggle named “Personalize”. Turn this on to apply your personalization.
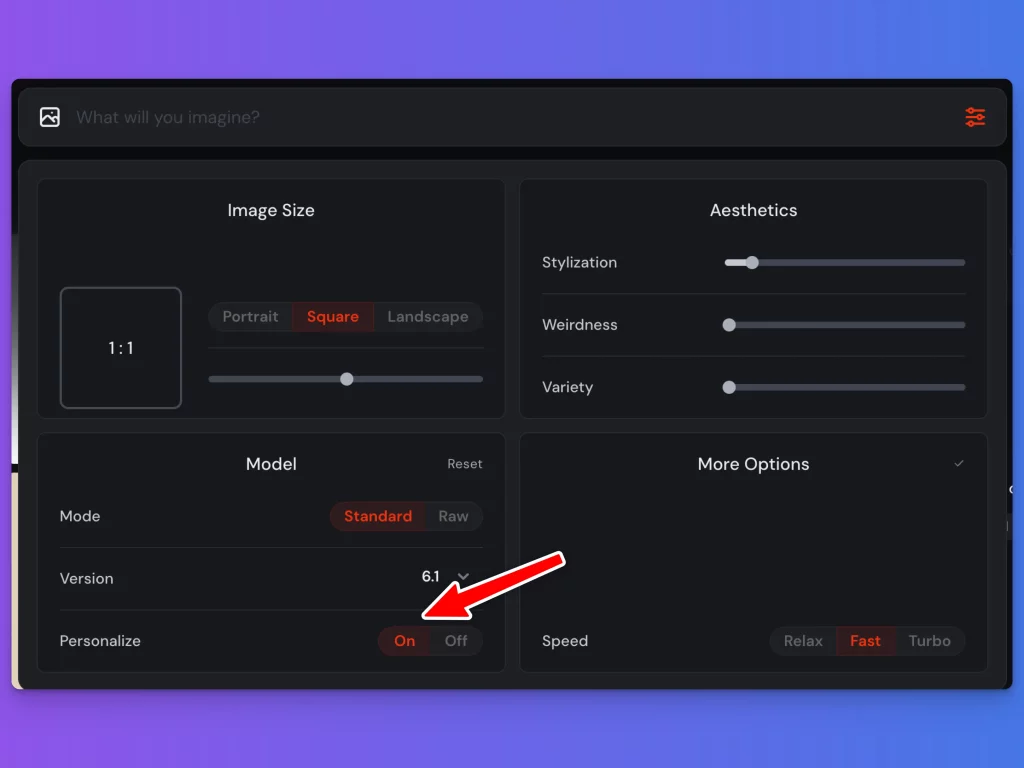
Alternatively you can add “–p” at the end of your text prompt to enable personalization. For example: “a beautiful sunset –p”
Personalization Codes
Personalization codes are a unique feature in Midjourney that add an extra layer of customization to your image generation. Here’s what you need to know about them.
What are They?
Personalization codes are unique identifiers that represent your personal style preferences in Midjourney. Think of them as a shorthand for all the image ratings you’ve done.
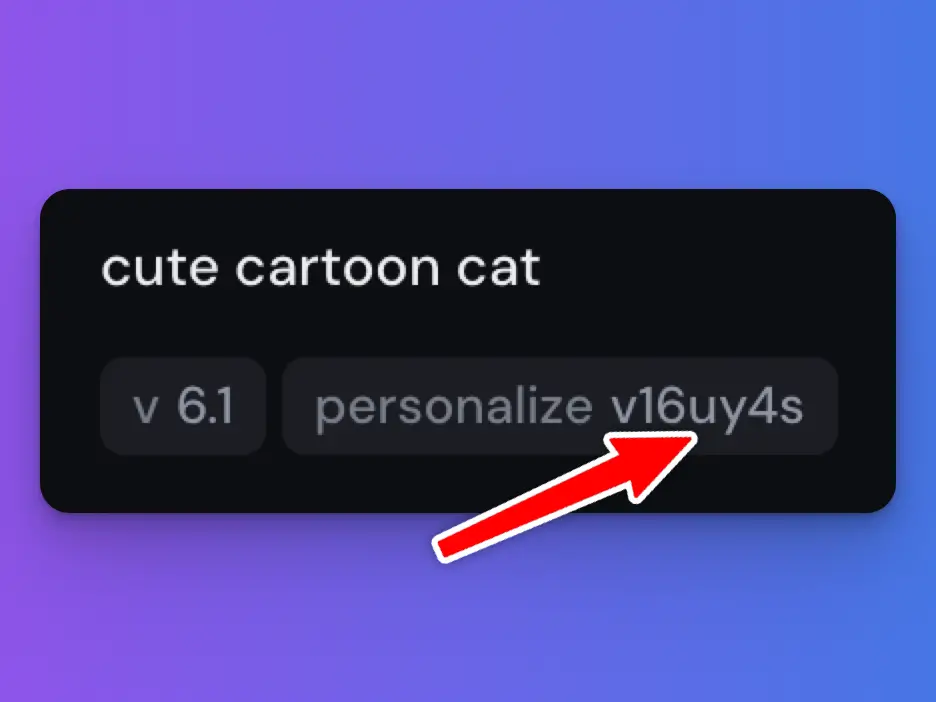
How to Find your Code
After you’ve enabled personalization and generated an image, look for a code in the image information. It usually looks like a mix of letters and numbers, such as v16uy4s.
Using your Own Code
You don’t actually need to input your own code – Midjourney applies it automatically when you use the –p flag or toggle on personalization.
Using Others’ Codes
This is where it gets interesting. You can use anyone’s personalization code in your prompts. Just add –p followed by the code at the end of your prompt. For example:
“a serene lake at sunset –p abc123”
Mix codes
You can even combine multiple codes in a single prompt. This blends different styles together, potentially creating unique results. For example:
“a futuristic cityscape –p code1 code2 code3”
Find codes to try
Many Midjourney users and AI influencers share their codes on social media platforms. It’s a great way to experiment with different styles and see how other users have trained their AI.
Remember, using someone else’s code doesn’t override your own preferences entirely. It’s more like adding their style influence to your prompt. Play around with different codes and combinations to see what kind of results you get. It’s a fun way to expand your Midjourney toolkit and discover new artistic directions.
Examples of Personalized Images
Let’s look at some real examples to see how personalization can change your Midjourney results. I’ll show you comparisons using the same prompts, with and without personalization.
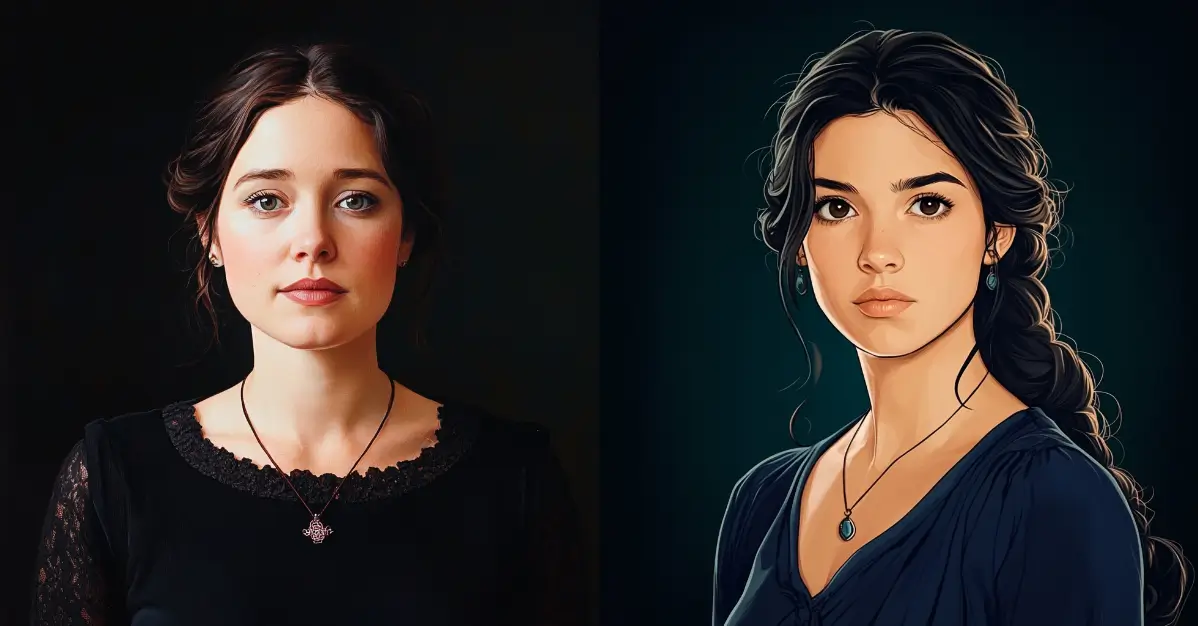
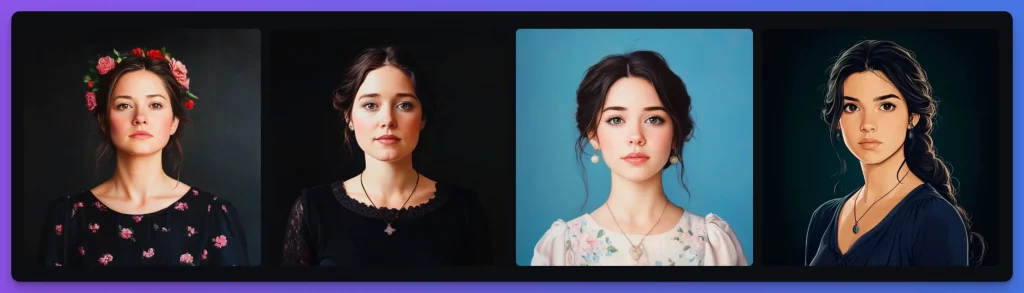
Example 1: “Portrait of a beautiful lady”
Without Personalization
When I first tried this prompt without personalization, Midjourney gave me four images with varied styles. The portraits were okay, but the backgrounds were busy and didn’t really match what I had in mind. There were lots of details that distracted from the main subject.
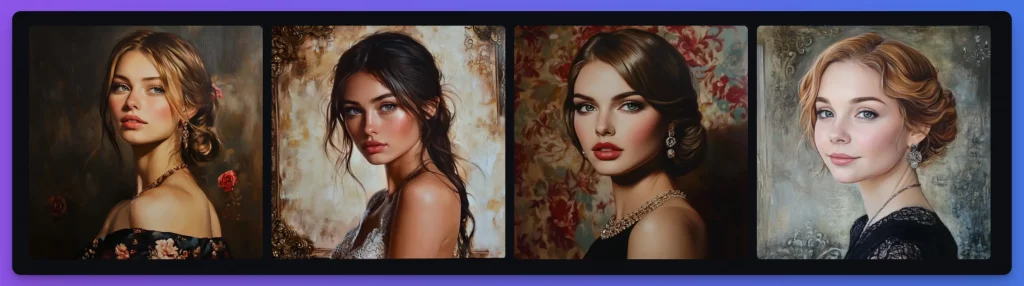
With Personalization
After turning on personalization and using the same prompt, the results were noticeably different. The portraits had cleaner, solid backgrounds. The focus was clearly on the lady, with less distracting elements. The overall style felt more aligned with my preferences for simpler, more elegant compositions.
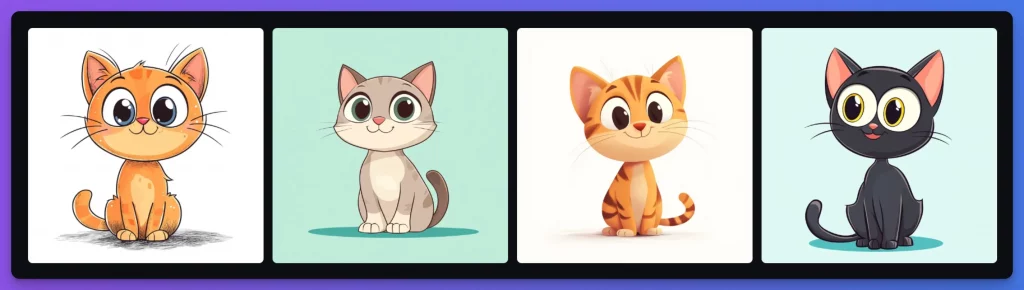
Example 2: “Cute cartoon cat”
Without Personalization
The default results for this prompt were colorful and varied. Some cats were more realistic, others more stylized. The backgrounds ranged from simple to complex, with different color schemes.

With Personalization
Using my personalized style, the cartoon cats came out more consistent with my preferences. The lines were cleaner, the colors more muted, and the overall style was closer to the type of cartoon art I tend to like.
In both examples, personalization led to more consistent results that better matched my style. The images felt more polished and aligned with what I usually go for in terms of composition, color palette, and overall aesthetic.
The differences might seem subtle at first, but they can save you a lot of time. Instead of having to refine your prompt multiple times to get the style you want, personalization often gets you closer to your desired result on the first try.
Personalization in Midjourney is a powerful feature that can significantly improve your AI art creation process. By learning your preferences, it helps you generate images that are more in line with your unique style and vision.
The main advantage? Time saved. Instead of tweaking prompts repeatedly to get the right look, personalization often delivers results you’ll love right from the start. It’s like having an AI assistant that understands your artistic taste.
But personalization isn’t just about efficiency. It’s also about creativity. By using other people’s codes or combining multiple styles, you can push your art in new directions and discover unexpected visual combinations.
Midjourney is constantly evolving, and so are its personalization features. Keep an eye out for updates and new ways to refine your personalized style.
3 Comments