How to Create Multiple Personalization Profiles and Moodboards in Midjourney
If someone asked me about my favorite feature in Midjourney, I’d say it’s personalization. It’s the perfect feature to align AI-generated images with my own style.
Until recently, personalization in Midjourney was pretty basic—you could only have one profile. While that was a step in the right direction, it wasn’t enough when managing different projects or creative styles.
Now, MidJourney has introduced two major updates that make things a whole lot better: multiple personalization profiles and moodboards.
With multiple personalization profiles, you can set up different profiles for different needs. On the other hand, moodboards give you more control over the inspiration, letting you handpick the images the AI learns from.
If you’re someone who juggles multiple creative projects, these features can save you a lot of time while keeping your work consistent. Let me show you how to use them.
What are Personalization Profiles?
Personalization profiles allow you to train Midjourney to match a specific visual style. The process is straightforward: Midjourney shows you two images, and you pick the one that aligns better with your taste.
The setup takes a bit of effort:
- 40 ratings are needed to get started.
- By 200 ratings, the profile becomes more stable.
- With 2,000 ratings, the results will get even sharper and closer to your preferences.
The only downside? You can’t pick the images yourself. Midjourney decides what to show, and you choose between the two options. While that works well for general styles, it can feel limiting at times.
That’s where moodboards come in to fill the gap.
What Are Moodboards?
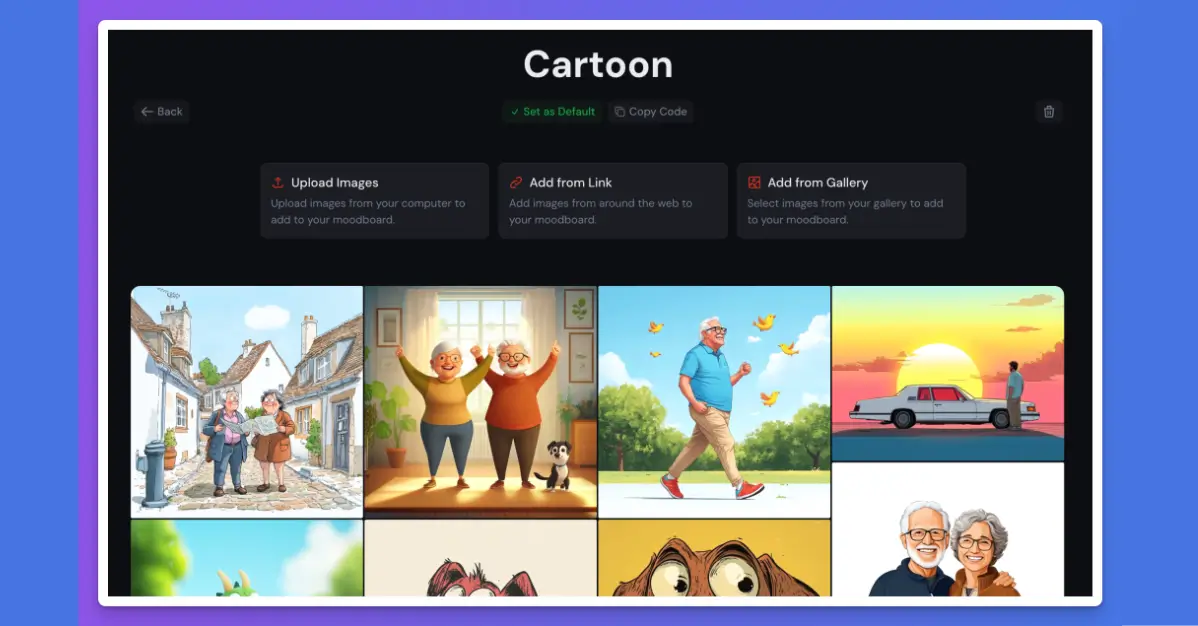
Moodboards are boards where you can add your own images to influence the style of generated artwork. This gives you more control over the inspiration Midjourney uses to create new images.
Instead of relying on the AI’s choices, you can upload visuals that match your vision. The more diverse and carefully chosen your images, the better the results.
For example, if you’re working on a vintage-themed project, you can upload old posters, photos, or illustrations to guide the AI. It’s a great way to fine-tune the outcome to exactly what you’re looking for.
How to Create Multiple Personalization Profiles
Setting up a personalization profile is pretty simple. Here’s what you need to do:
1. Go to midjourney.com.
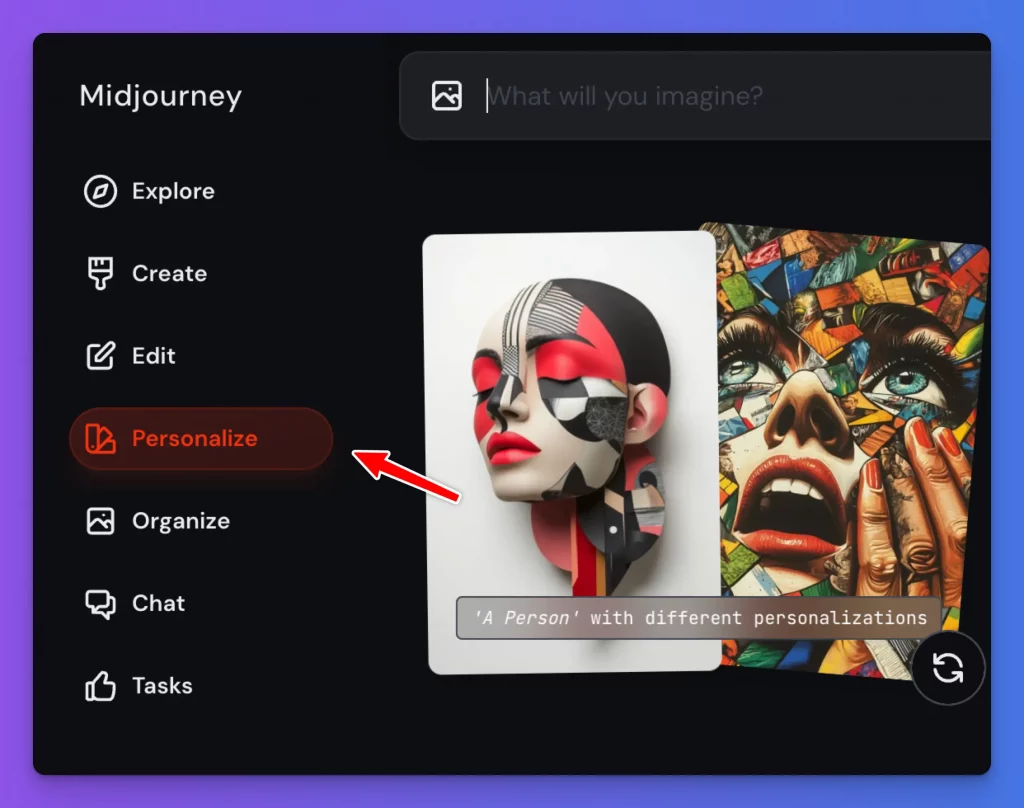
2. From the sidebar menu, select ‘Personalize’.
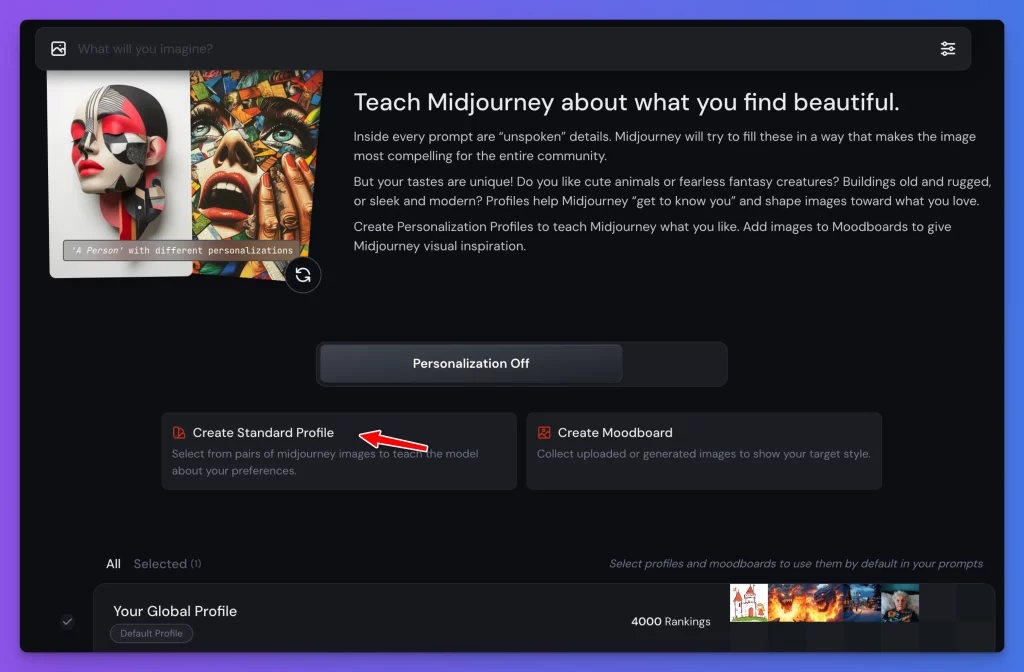
3. Click on ‘Create Standard Profile’.
4. MidJourney will show you two images. Pick the one you like better, or click ‘Skip’ if neither works for you.
5. Keep going until you’ve rated at least 40 images.
Once you hit 40 ratings, you’ll see a message:
“You’ve unlocked this profile!”
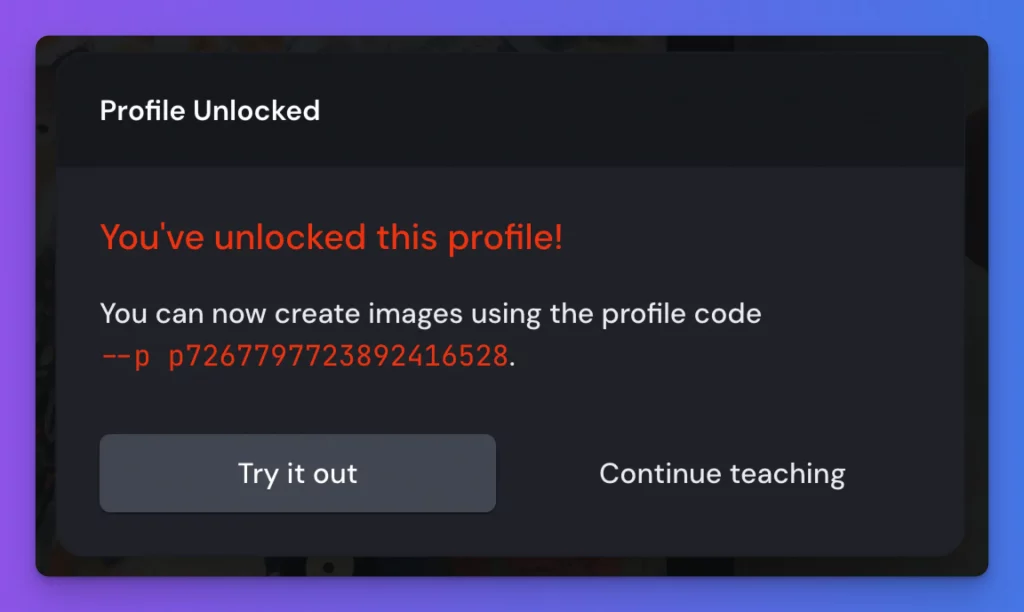
You’ll also get a profile code (something like –p p7267797723892416528). Just add this code at the end of your prompt to generate images that match the profile.
For example:
a beautiful cityscape at sunset –p p7267797723892416528
On the “Personalize” page, you can:
- Rename your profiles for easy organization.
- Set one of the profiles as your default. You can also combine profiles and make them default.
- Switch between profiles directly while creating prompts.
How to Create a Moodboard in Midjourney
Creating a moodboard is even more flexible. Here’s how you can do it:
1. From the sidebar menu, select ‘Personalize’.
2. Click on ‘Create Moodboard’.
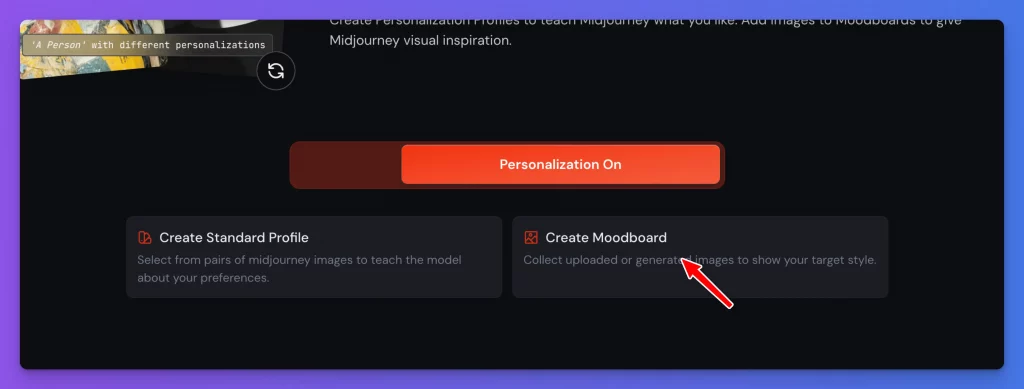
3. Add images to the moodboard using one of these options:
- Upload images directly from your device.
- Add from a link (great for online visuals).
- Add from your gallery of past images.
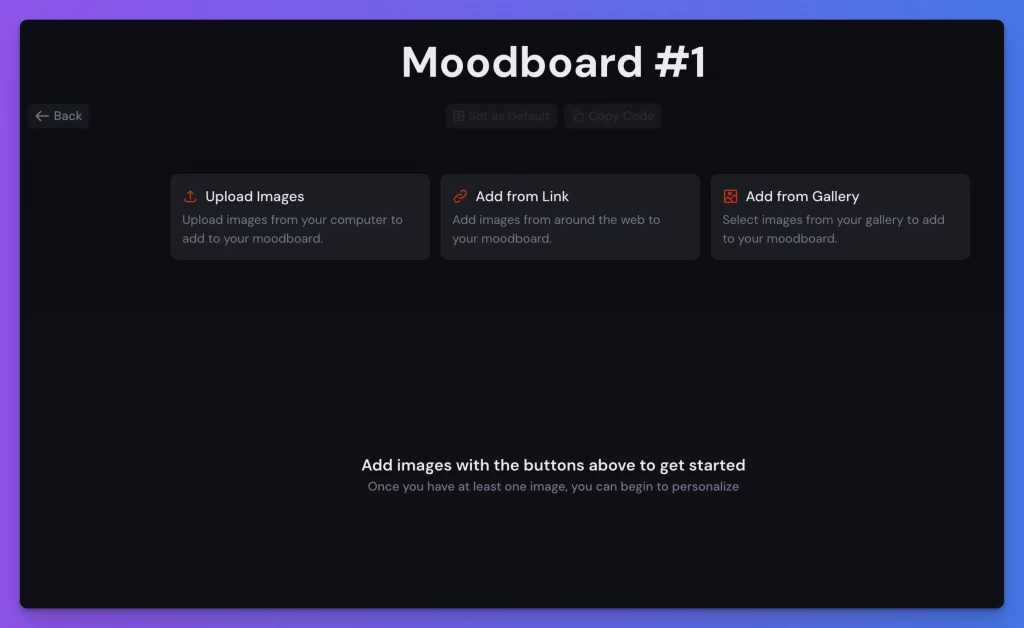
4. Give your moodboard a name.
5. If you want, you can set it as your default moodboard.
Like profiles, each moodboard gets a code (e.g., –p m7267801530722418712). Add this code to your prompts, and Midjourney will use the moodboard’s images as inspiration.
For example:
a cozy Christmas scene with soft lighting –p m7267801530722418712
Moodboards make it easy to experiment with new themes or maintain consistency across different projects.
Tips for Better Results
- Take your time when rating images for personalization profiles. Focus on selecting visuals that truly align with your style.
- Curate your moodboard images carefully. Mix visuals that complement each other but offer enough variety for unique results.
- Use moodboards and personalization profiles together. Adding both codes to a single prompt can create something truly unique.
- Rename your profiles and moodboards with clear labels so you can find them easily when switching between projects.
Why These Features Matter
Multiple personalization profiles and moodboards make it easier to manage different creative projects.
If you’re someone like me who works on a variety of styles—whether it’s cute illustrations, realistic landscapes, or spooky Halloween art—you no longer have to settle for a one-size-fits-all profile.
Moodboards add another layer of control, letting you guide the AI with handpicked visuals. It feels like a natural way to merge your creativity with Midjourney’s capabilities.
These new features in Midjourney have been a game-changer for my creative process. They make the AI feel more personal, flexible, and aligned with my work.
If you haven’t tried creating multiple personalization profiles or moodboards yet, I highly recommend giving them a shot. You’ll be surprised at how much they can improve your results and speed up your workflow.
Let me know how these tools work for you!
