How to Switch Outfits in Photos Using Midjourney
If you’ve ever wanted to quickly change someone’s outfit in a photo without spending hours in Photoshop, Midjourney’s new Edit feature might be exactly what you need. I recently got my hands on this tool and spent quite a bit of time testing it out, specifically focusing on changing clothes in photos.
The Edit feature is pretty straightforward – you can upload your own image or use an image URL, and then modify it however you want. You can either edit specific parts of the image or change its entire texture. Today, I’ll show you exactly how I change clothing in photos using this feature.
But before we start, there’s something you should know. Right now, not everyone has access to this feature since it’s still in early testing. You’ll need to meet one of these requirements:
- Have a yearly Midjourney membership
- Been subscribed to Midjourney for the past 12 months
- Have created more than 10,000 images on the platform

If you meet any of these criteria, let’s continue and I’ll show you how to change clothing in your photos step by step. Even if you don’t have access yet, this guide will help you understand what’s possible when you do get it.
Step-by-Step Guide
- Get Started
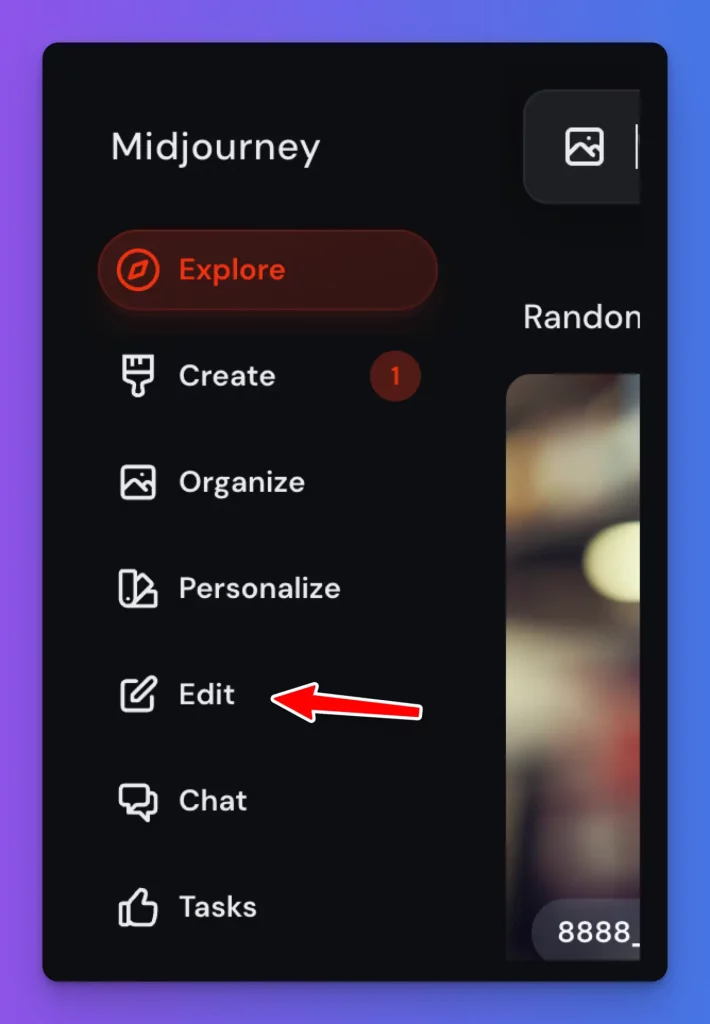
Let me walk you through the exact process I use. First, head over to midjourney.com and look for the Edit button in the main menu. Click it, and you’ll see a new interface with various options.
- Set Up Your Workspace
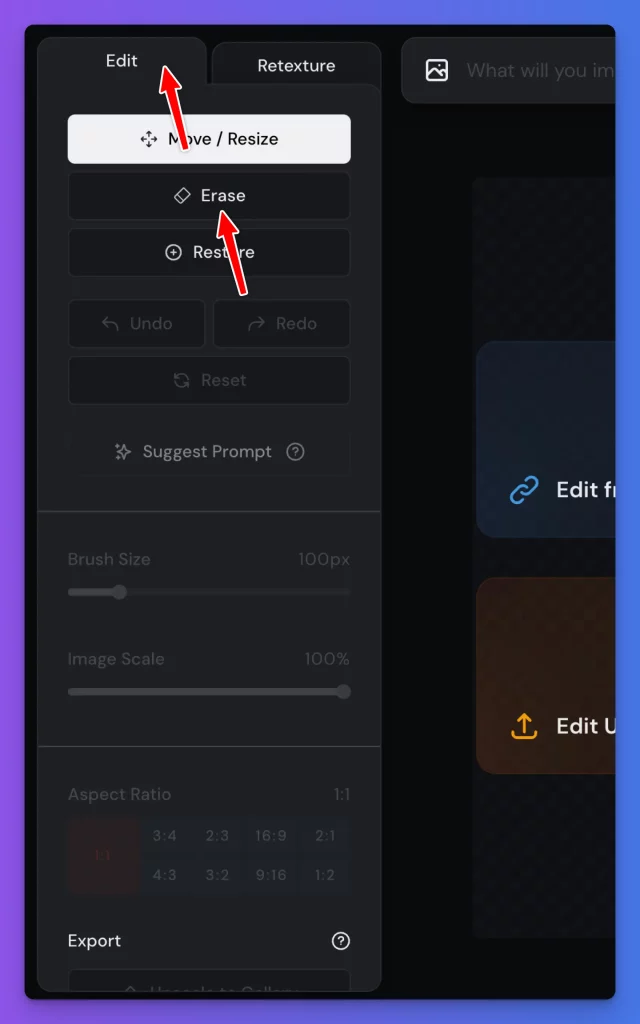
On the left side of your screen, make sure you’ve selected the Edit tab. Then, click on the Erase option – this is what we’ll use to remove existing clothing from our image. The interface is clean and simple, which makes it easy to find what you need.
- Upload Your Image
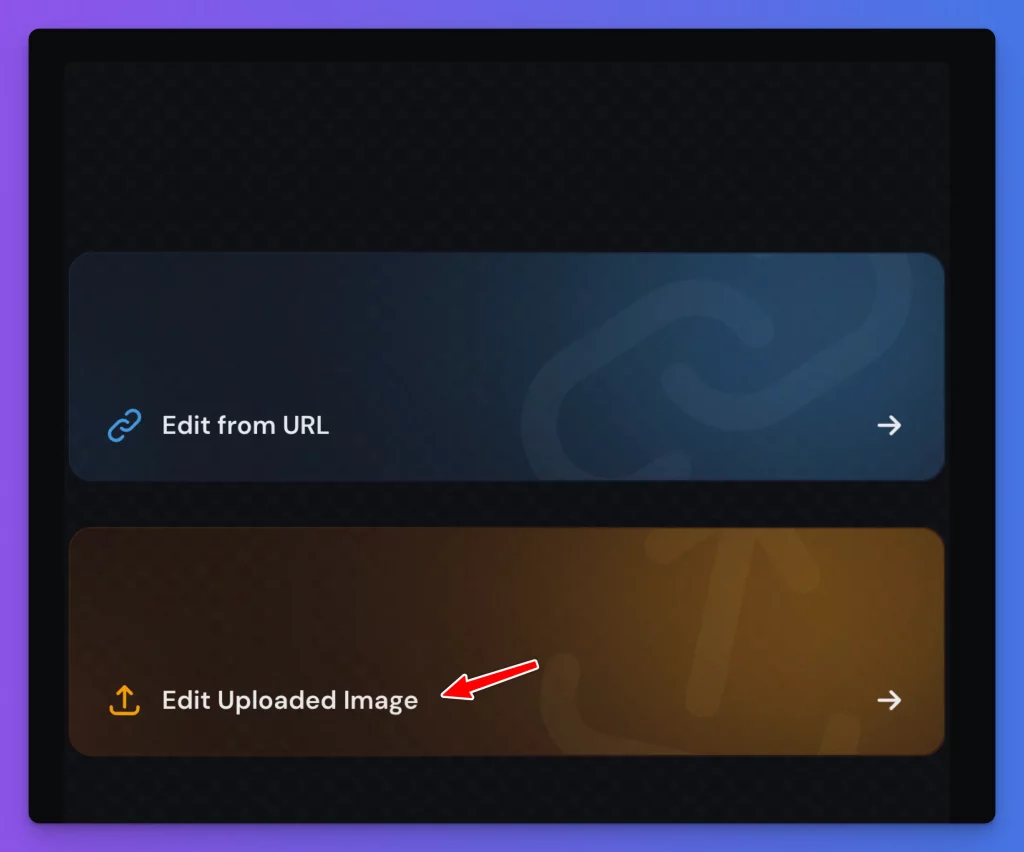
Look for the Edit Uploaded Image button on the right side of your screen. Click it and select the photo you want to work with. I’d recommend starting with a clear, well-lit photo where the clothing is easily visible.
- Erase the Clothing
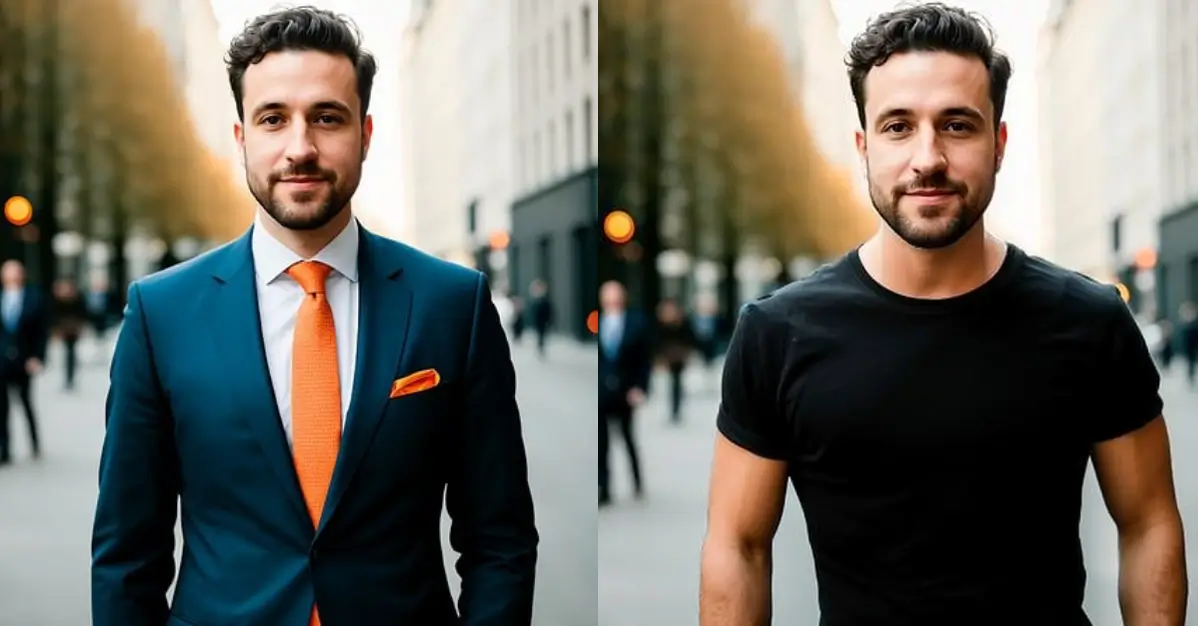
This is where the magic starts. Using the eraser tool, carefully remove the clothing you want to change. For example, when I worked on a photo of someone wearing a suit, I erased just the suit area.
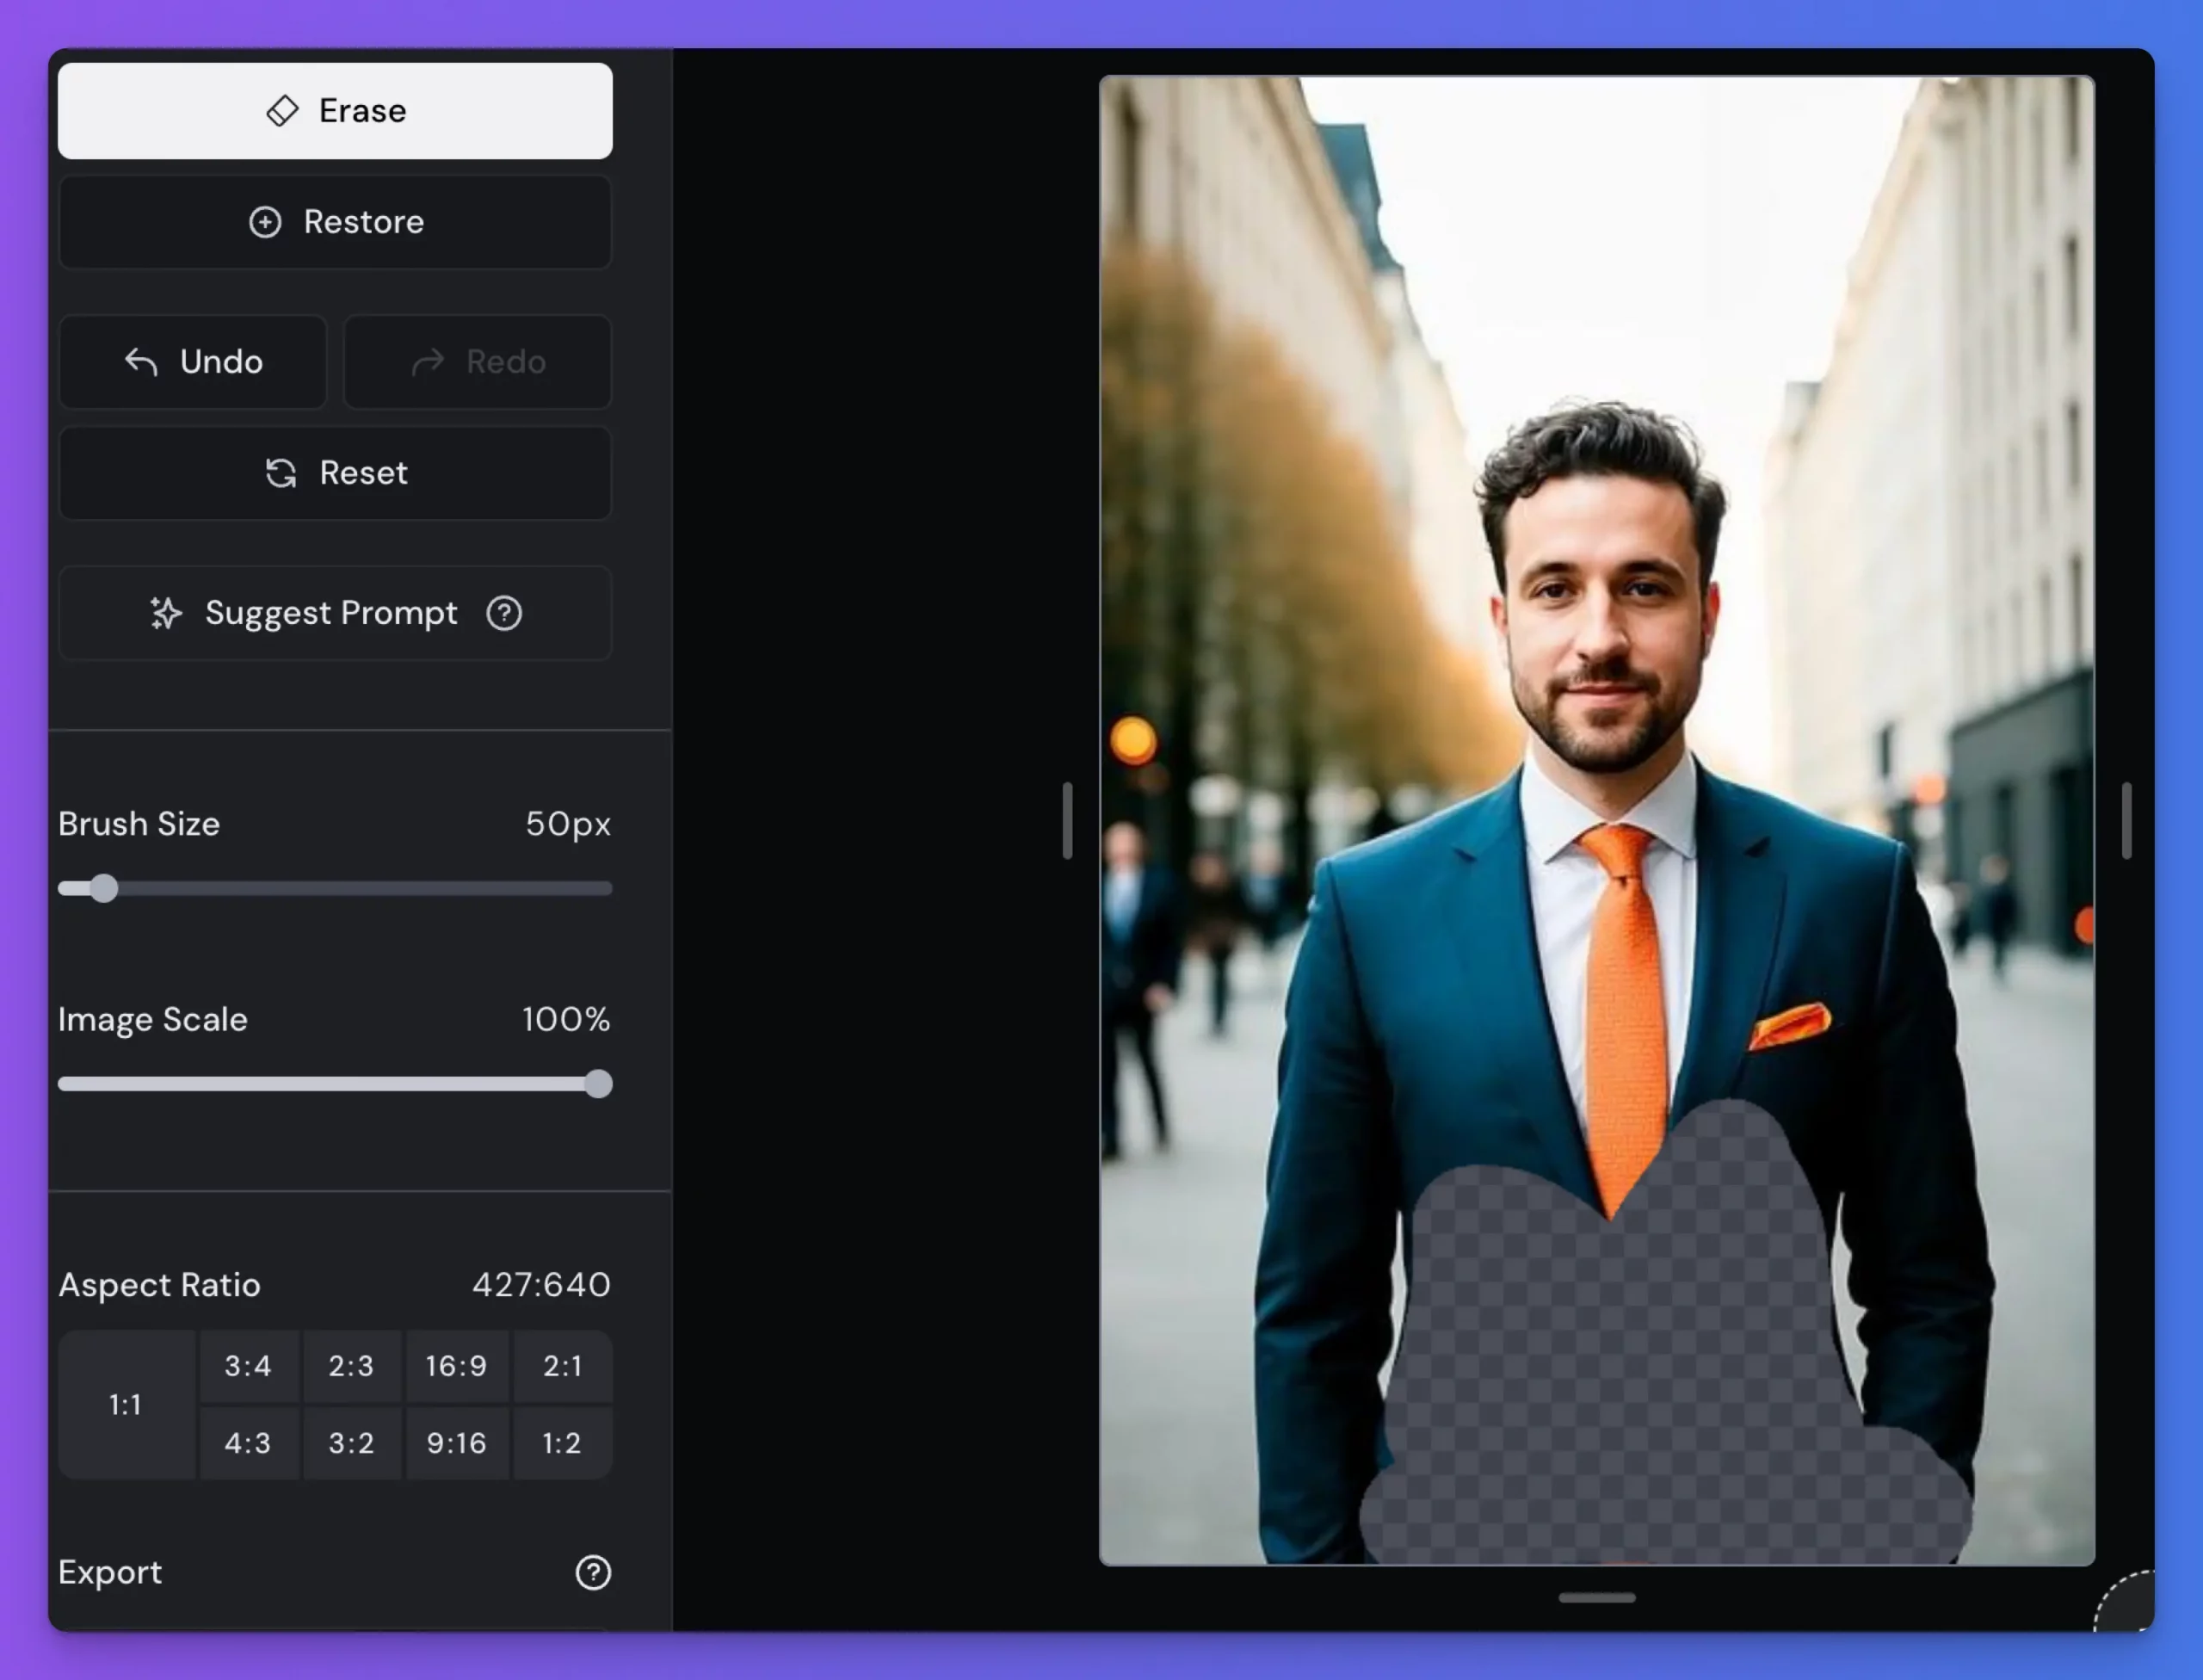
Pro tip: You can adjust the brush size to make this easier. I usually use a larger brush for big areas and switch to a smaller one for details around the edges.
- Add Your New Clothing
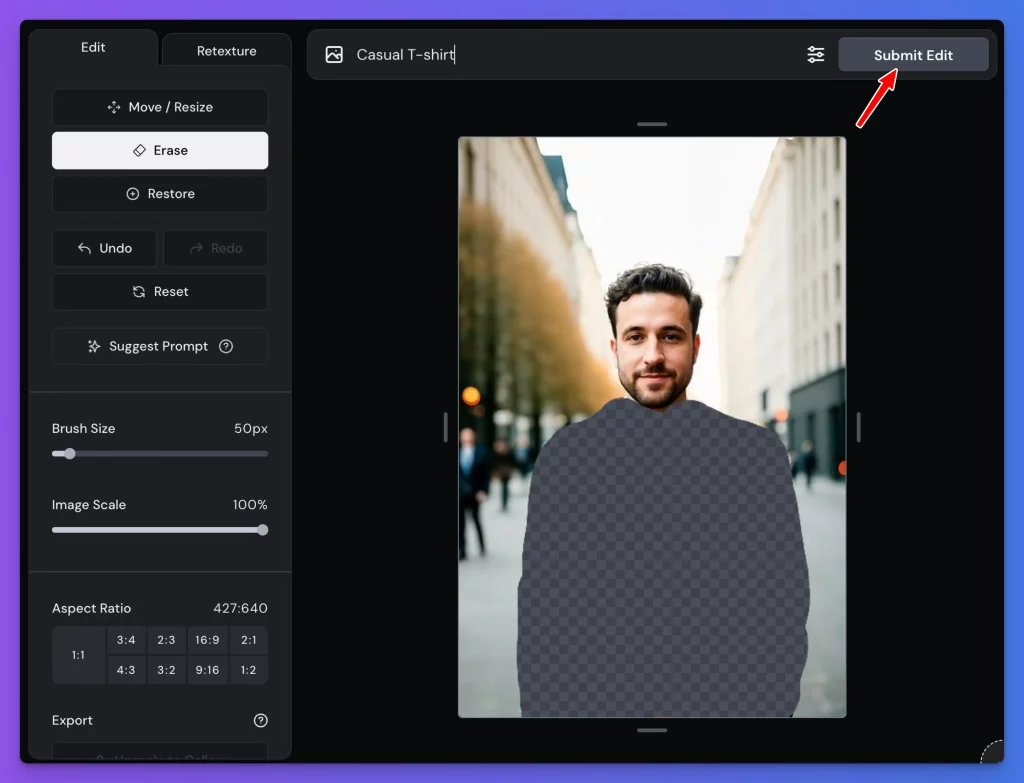
After erasing, it’s time to tell Midjourney what you want instead. This is done through a simple prompt. Keep it clear and specific. When I wanted to change the suit to a casual t-shirt, I simply typed “casual t-shirt” in the prompt box. Then hit Submit Edit and wait a few seconds.
- Choose Your Result
Midjourney will show you four different versions of your edited image. Take your time to look through them and pick the one that looks most natural. In my suit-to-t-shirt example, I got a perfect black t-shirt replacement in one of the options.

- Save Your Work
Once you’re happy with the result, just click Download Image to save it to your device. It’s that simple!
Examples
Let me share three different edits I tried – these will give you a good idea of what’s possible with this feature.
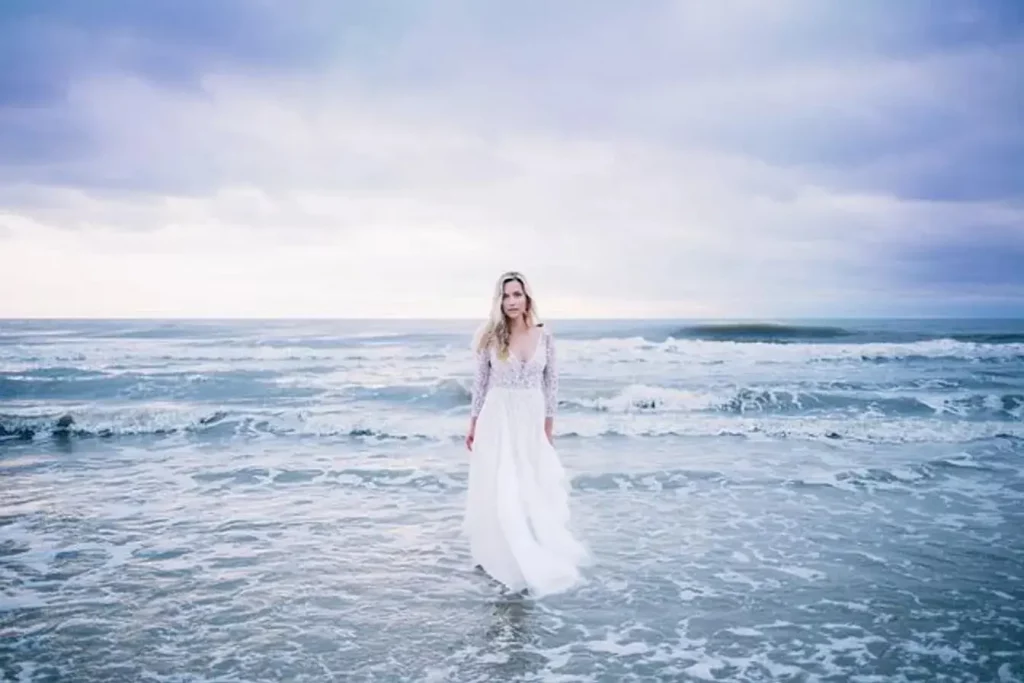
Example 1: Beach Dress to Wedding Gown
I started with a photo of a woman standing in the ocean, wearing a simple white dress. The lighting was nice, and the pose was natural – perfect for editing.
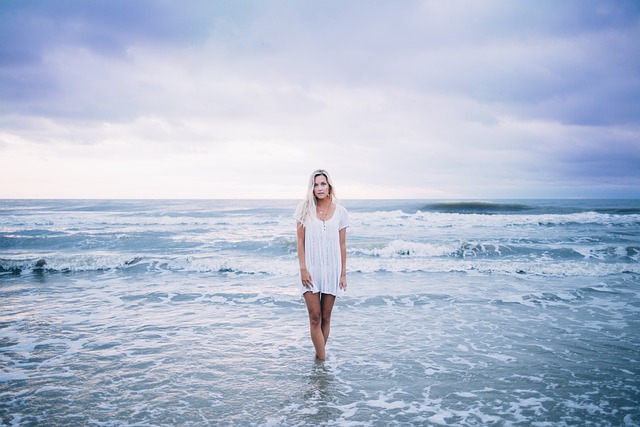
After erasing the dress, I typed “wedding gown” in the prompt. The result? The casual beach dress transformed into an elegant wedding gown. The AI managed to keep the pose and lighting consistent while completely changing the style of the dress.
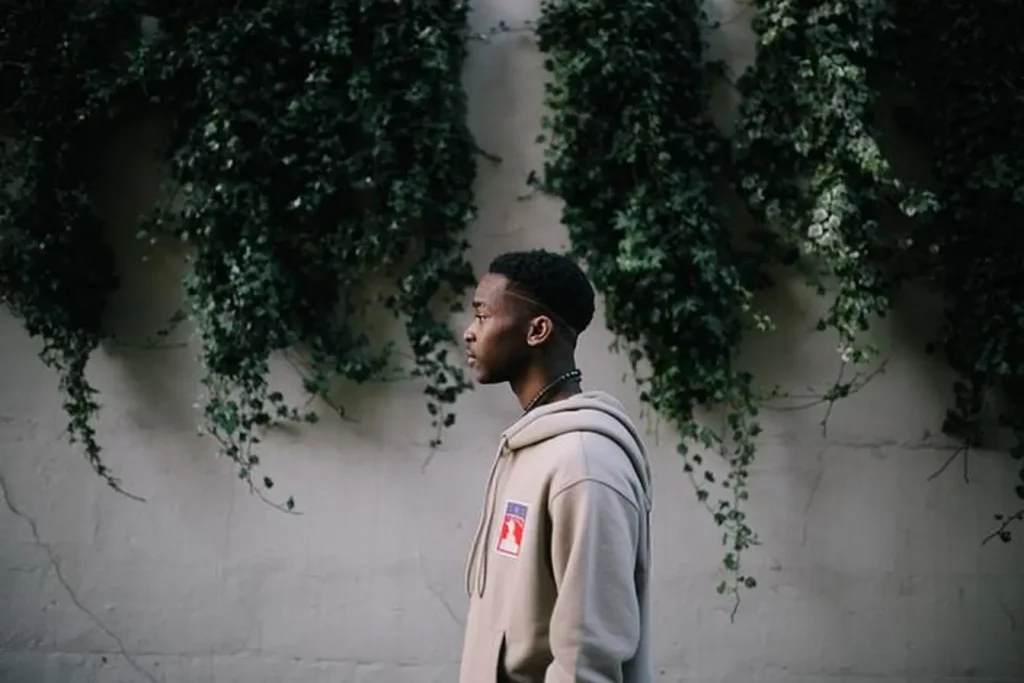
Example 2: Simple Attire to Casual Hoodie
For this one, I worked with a photo of a Black man standing in front of an ivy-covered wall.
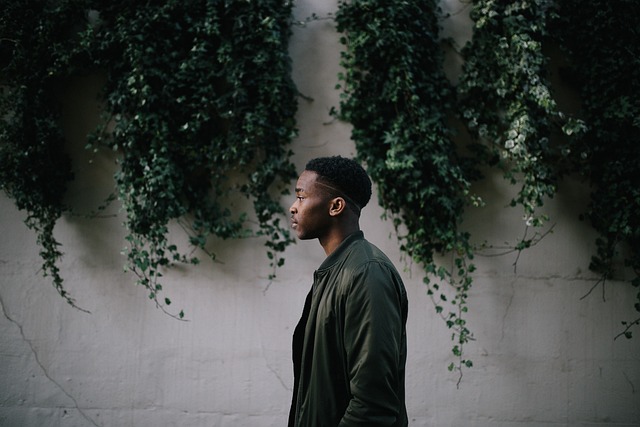
I carefully erased his outfit and added the prompt “hoodie.” The change looked natural – the new hoodie fit well with both his pose and the background. The texture and shadows on the hoodie looked realistic, which really helped sell the edit.
Example 3: Plaid to Simple
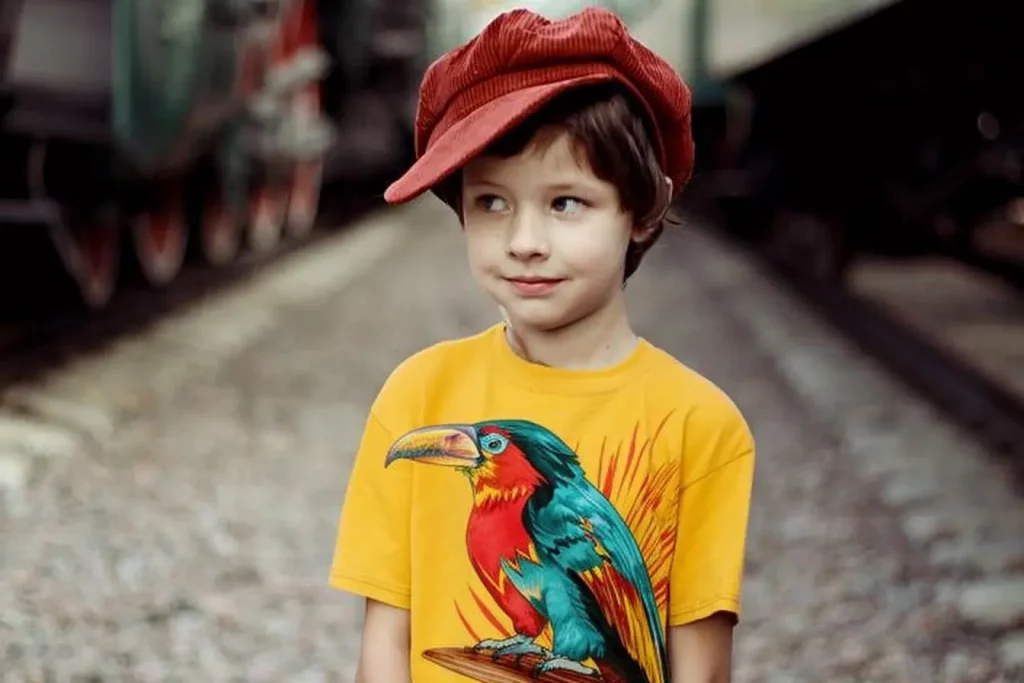
This time, I used a photo of a young boy with an orange and blue plaid shirt. He was standing with his arms crossed – a pose that could be tricky for AI.
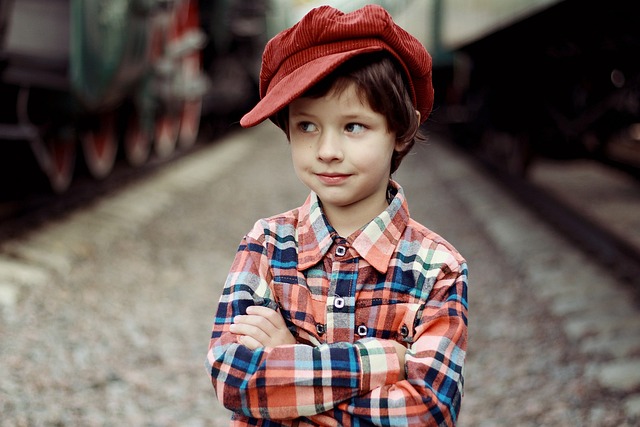
I erased the plaid shirt and used “colorful t-shirt” as my prompt. The result was good – the t-shirt looked natural, and instead of crossed arms pose AI gave a simple pose.
Key Things I Learned
- Image Quality Matters
The better your starting photo, the better your results will be. Clear, well-lit photos work best. - Results Vary
Sometimes you’ll get perfect results on your first try. Other times, you might need a few attempts to get exactly what you want. - Careful Erasing is Key
The more precise you are with the eraser tool, the better your results will be. Take your time with this step. - Simple Prompts Work Best
You don’t need complicated prompts. Clear, straightforward descriptions like “red t-shirt” or “blue dress” work well.
After spending time with Midjourney’s Edit feature, I can tell you it’s a useful tool that makes clothing changes in photos surprisingly simple. You don’t need to be a Photoshop expert or spend hours editing – just erase, type a prompt, and pick your favorite result.
Is it perfect? No. Sometimes the AI might give you results that look a bit off, especially with complex clothing or unusual poses. But when it works (which is most of the time), it works really well.
Start with simple edits – like changing a t-shirt to another t-shirt – and then work your way up to more complex changes as you get comfortable with the tool. Pay attention to the lighting and pose in your original photo, as these make a big difference in how natural the final edit looks.
A final note: This feature is still new and improving. The more I use it, the more I find new ways to make it work better. If you have access to it, I’d say give it a try – you might be surprised by what you can create.
I’d love to hear about your experiences and see what kind of clothing changes you’ve managed to create with it.
