How to Set Up Claude Code on Mac
Developers are falling in love with Claude Code, and I can see why. It has become the go-to tool for anyone who wants to build apps without writing every single line of code themselves.
Whether you are an experienced developer or just starting out, Claude Code makes the process feel less like work and more like a conversation with a smart assistant.
I recently set it up on my Mac, and it took me less than five minutes. If you are curious about what Claude Code is or how to install it on your machine, let me walk you through the entire process step by step.
What Is Claude Code?
Before we get into the installation steps, you should know what Claude Code actually is. It is an agentic coding tool created by Anthropic that lives right inside your terminal. Think of it as your coding partner who helps you turn ideas into working applications faster than you ever thought possible.
Unlike traditional coding where you write every line yourself, Claude Code understands what you want to build and generates the necessary code for you. You describe your app idea, and Claude Code handles the heavy lifting. This is what developers call ‘vibe coding,’ and it has completely changed how people approach software development.
What You Need Before Installing
Before you can start using Claude Code, you need one of these subscriptions:
- Claude Pro subscription
- Claude Max subscription
- Claude Teams subscription
- Claude Enterprise subscription
- Claude Console account
If you already have one of these, you are all set. If not, head over to Claude’s website and choose the plan that fits your needs.
Install Claude Code on Your Mac
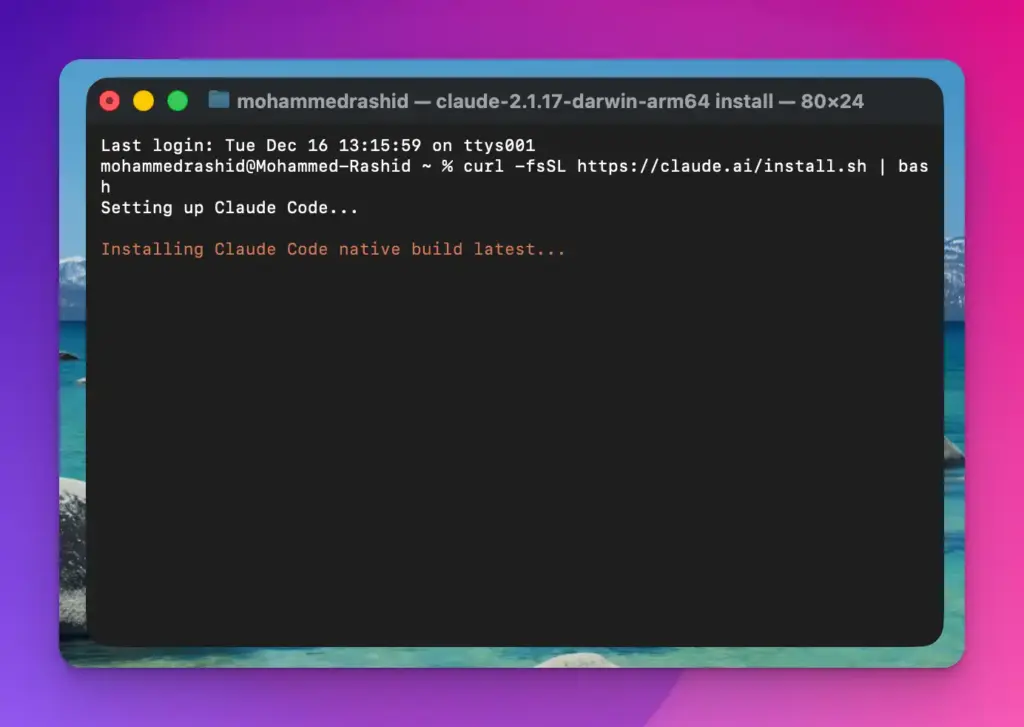
The installation process is surprisingly simple. Open your Mac’s terminal application and paste this command:
curl -fsSL https://claude.ai/install.sh | bash
Press Enter and wait. The installation takes only a few seconds. Your terminal will show some messages as it downloads and installs the necessary files. Once it finishes, Claude Code will be ready to use.
Set Up Your First Project
Now that Claude Code is installed, you need to create a project folder or use an existing one. Here is how you set everything up:
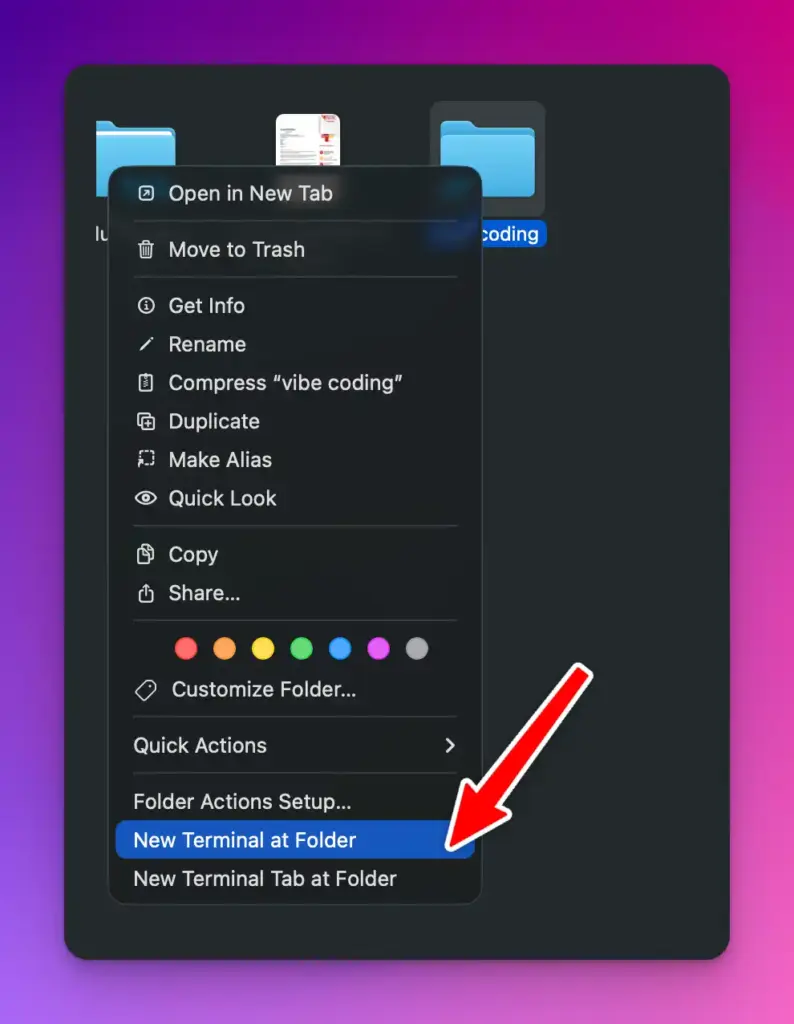
First, create a new folder on your Mac where you want your project files to live. You can do this through Finder or by using terminal commands. If you already have a project folder you want to work with, that works too.
Right-click on your project folder and select ‘New Terminal at Folder.’ This opens a terminal window that is already pointed to your project directory.
Launch Claude Code
In your terminal window, type:
claude
Press return, and Claude Code springs to life. The first time you run it, you will need to make a few choices to customize your experience.
Choose Your Theme
Claude Code will ask you to pick a theme. You will see options like dark mode, light mode, and a few other color schemes. Use your keyboard’s arrow keys to highlight the theme you prefer, then press Return to confirm your choice.
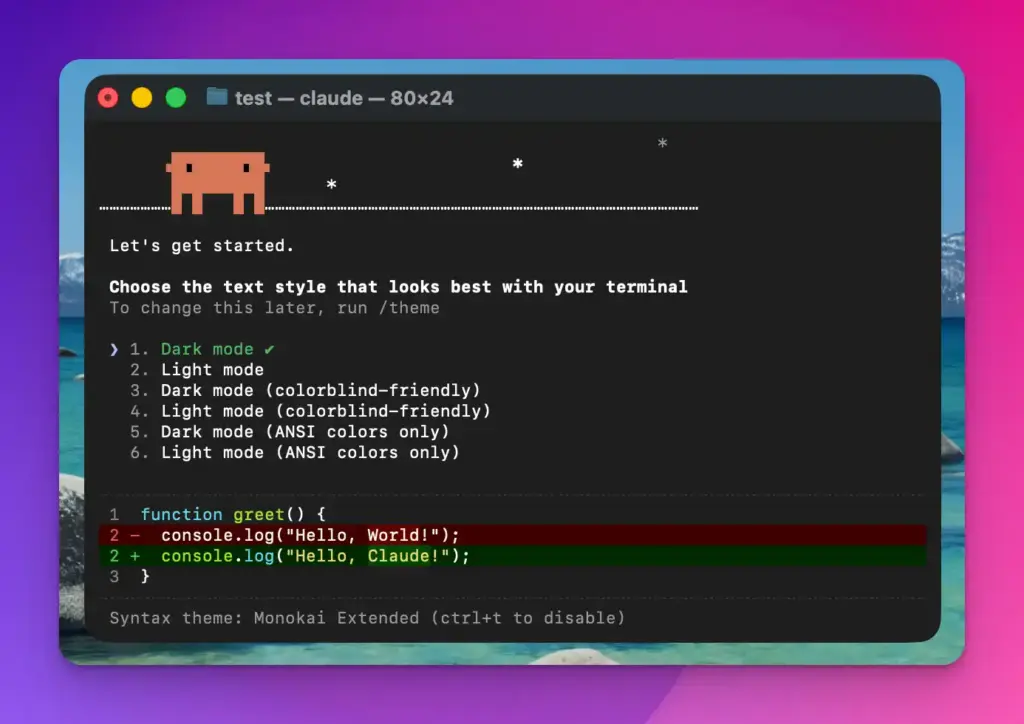
I went with dark mode because I spend a lot of time coding at night, but choose whatever feels comfortable for your eyes.
Log In to Your Account
Next, Claude Code will present you with login options. Select the option that matches your subscription type. When you make your selection, Claude Code will open your web browser and prompt you to log in.
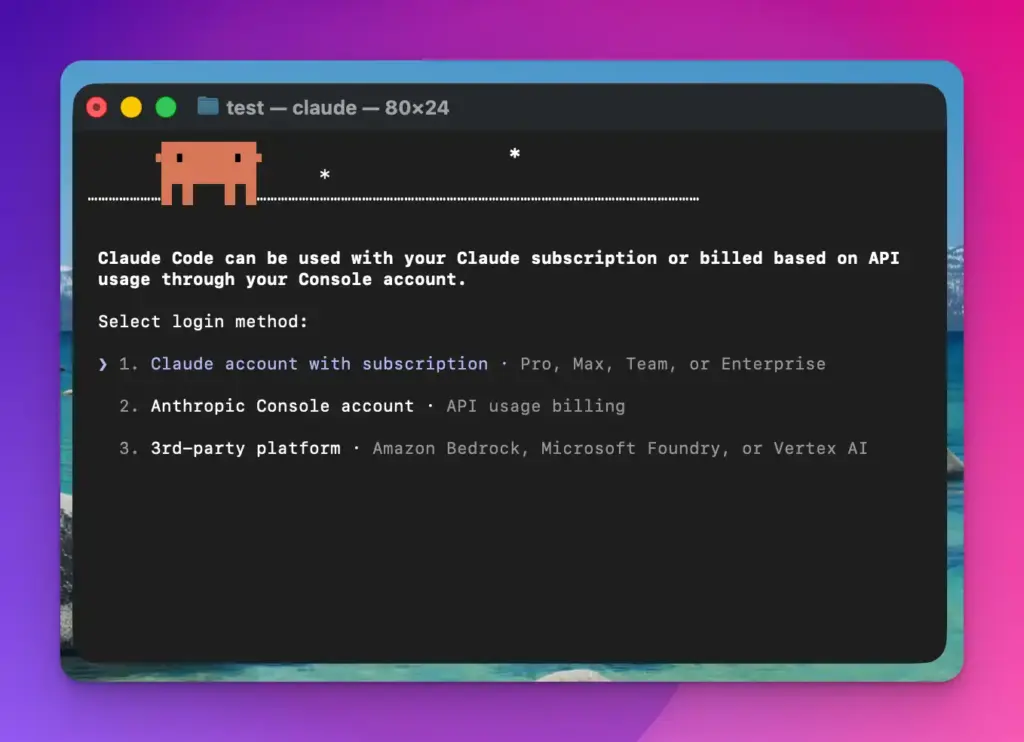
Complete the login process in your browser. Once you are logged in, you can close the browser tab and return to your terminal. You might see some confirmation messages. Just press Return to continue through them.
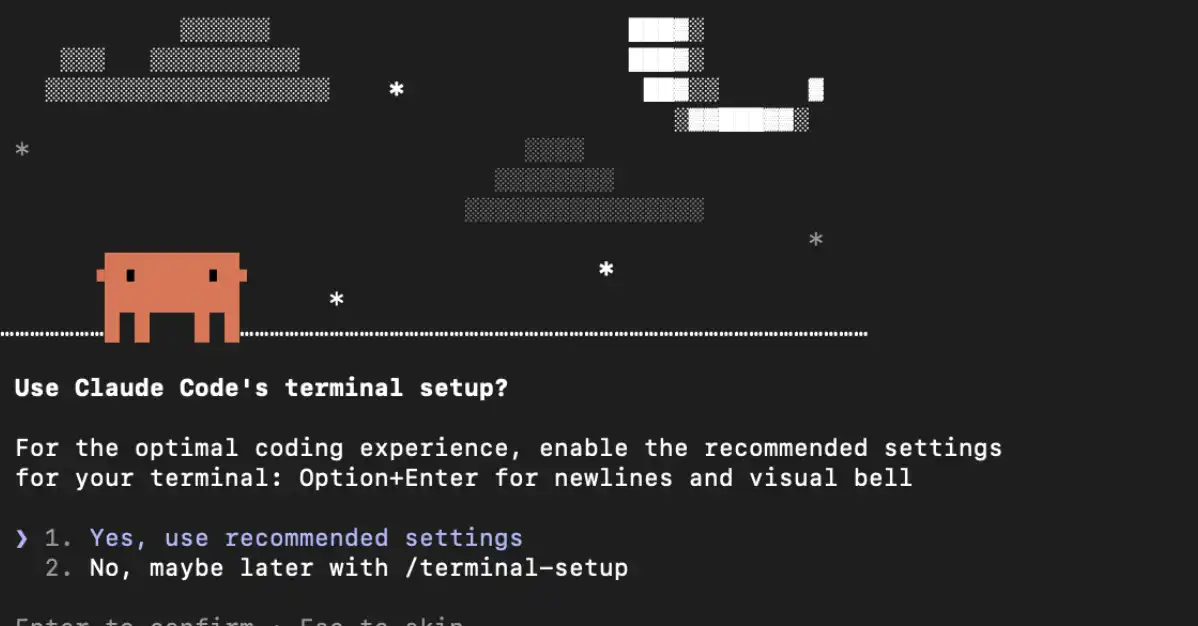
Configure Terminal Settings
Claude Code will ask you about your terminal setup preferences. As someone new to the tool, I recommend choosing ‘Yes, use recommended settings’ when prompted. This ensures Claude Code works optimally without requiring you to tweak advanced settings.
Press Return to confirm this choice.
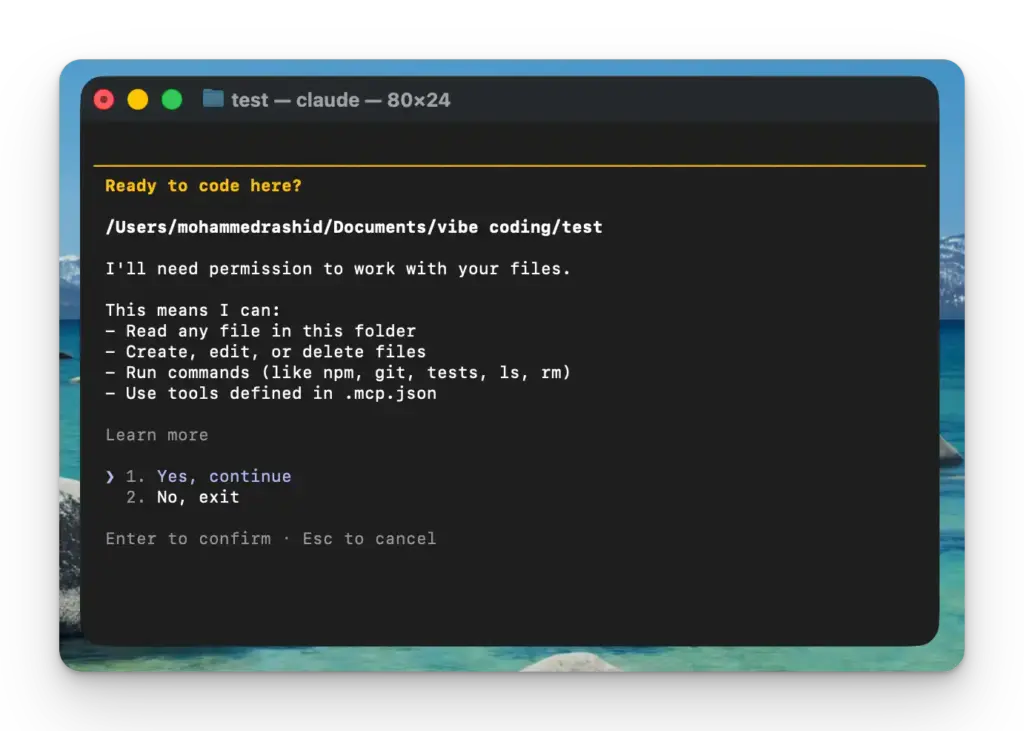
Grant File Access
The final setup step involves giving Claude Code permission to access files in your project folder. This is essential because Claude needs to read and write files to build your app. When the permission request appears, approve it.
That is it. Claude Code is now fully set up and ready to help you build applications.
Create Your First App
With everything configured, you can start building right away. If you are new to Claude Code, I suggest starting with something simple to get a feel for how it works.
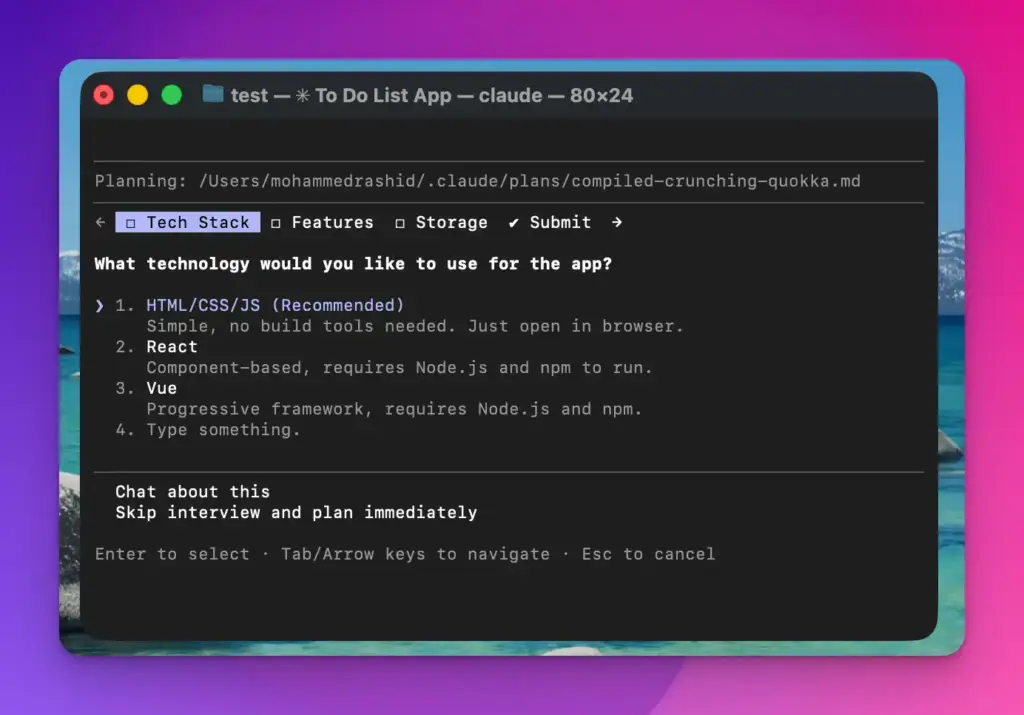
Try typing something like ‘create a beautiful to-do list app’ into the terminal. Claude Code will immediately start planning your app. During this planning phase, you might need to make choices about the tech stack, features, and design elements. Answer the prompts based on what you want.
Once the planning is complete, Claude Code begins creating your app. You will see options to auto-accept edits. I recommend enabling this feature because it speeds up the process significantly. Claude Code will generate all the necessary files and code.
When it finishes, Claude Code will prompt you to open your new app. Click to open it, and you will see your first Claude Code creation come to life. It feels almost magical watching something you described in plain English transform into a working application within minutes.
What Makes Claude Code Special
After using Claude Code for a while, I can tell you that this is just scratching the surface. The tool has incredible capabilities that go far beyond simple to-do list apps. You can build complex web applications, interactive tools, data visualizations, and much more.
The real power of Claude Code lies in how it understands context. You can have back-and-forth conversations with it, refining your app as you go. If something does not look right, just tell Claude Code what you want to change, and it will update the code accordingly.
I have been testing different types of projects, and I am consistently impressed by how well Claude Code interprets vague descriptions and turns them into functional code. It saves hours of writing boilerplate code and lets you focus on the creative aspects of building software.
Setting up Claude Code on Mac takes only a few minutes, but it opens up a world of possibilities for anyone who wants to build applications. The installation process is straightforward, and the tool itself is incredibly intuitive once you get started.
This is just the beginning. Claude Code has so much more to offer, and I will be writing more detailed guides about its advanced features in upcoming posts. Stay tuned for more tutorials on how to make the most of this tool.
If you run into any issues during setup, double-check that you have an active Claude subscription and that your Mac’s terminal permissions are properly configured. Most problems come from missing these basic requirements.